Security Settings
The Security Settings tab allows configuration of various security features including session timeouts, two-factor authentication, login failure handling, and automatic subscriber management. These settings help prevent automated attacks and password‐guessing attempts by locking out users who repeatedly provide incorrect login details.
To manage Interspire Email Marketer’s security settings:
- Click Settings in the toolbar, then click the Security settings tab.
Settings: Security Settings
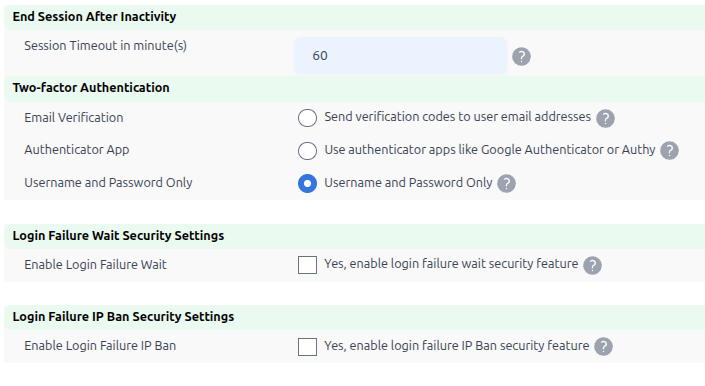
Session Timeout
- If you want to interrupt the current session after a period of inactivity, enter the time (in minutes) in the Session Timeout in minute(s) field. Entering 0 means no timeout.
Two-Factor Authentication Options
You can choose from several authentication methods:
-
Username and Password Authentication Only - This is the default option that requires only username and password for login.
-
Enable Two-factor Authentication - This option requires users to provide an OTP (One Time Password) every time they login to their accounts.
- In the OTP Threshold field, select the number of failed attempts allowed before the user is banned.
- In the OTP Resend Threshold field, select the number of times the user is allowed to request OTP resends before being banned.
-
Enable Two-factor Authentication app feature - This option allows users to use authentication apps like Google Authenticator for two-factor authentication.
- In the failed attempts field, select the number of failed attempts allowed before the user is banned.
Login Security Features
-
Enable login failure wait - When enabled, this feature adds a time delay after incorrect login attempts. The user must wait the specified number of seconds before being able to attempt to log in again.
- Select the delay time (in seconds) from the dropdown list.
-
Enable login failure IP Ban - When enabled, this feature prevents users who repeatedly provide incorrect login information from attempting to log in again for a specified time.
- In the Threshold field, select the number of failed login attempts permitted (from the same IP address).
- In the within field, select the time period in which these failed attempts must occur.
- In the Ban IP field, select the length of time for which the IP address is banned from attempting to log in.
RSS Feed Access Control v8.7.2
RSS feeds allow external applications and users to access your archived newsletter content. For security purposes, this feature is disabled by default.
To enable RSS feeds:
- Check the box to Enable RSS Feeds
- Click Save to apply the changes
When to enable:
- You want to provide public access to your newsletter archive
- You’re using RSS readers or external applications to monitor newsletter content
- You have a specific business need for RSS feed access
Security considerations:
- Only enable if you understand that archived newsletters will be accessible via RSS
- Consider whether your newsletter content should be publicly accessible
- Review your newsletter archive before enabling
List Maintenance
The List Maintenance section provides powerful automated tools to keep your subscriber lists clean, compliant, and optimized for deliverability. These features work automatically based on your configuration, reducing manual maintenance while improving campaign performance.
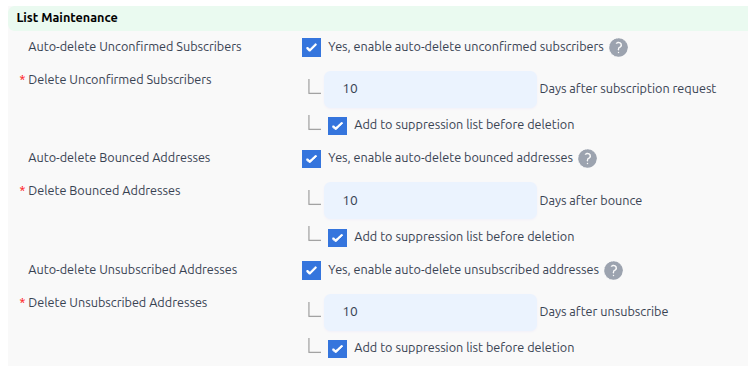
Auto-Delete Unconfirmed Subscribers
Automatically removes subscribers who have not confirmed their subscription after a specified period.
To configure:
- Check the box to enable Auto-delete Unconfirmed Subscribers
- In the Days after subscription request field, enter the number of days to wait before deletion (e.g., 10)
- (Optional) Check Add to suppression list before deletion to prevent these addresses from being re-imported
Suppression option: Enable if you import contacts from multiple sources (CRM, CSV files, etc.) to prevent re-adding unconfirmed addresses.
Auto-Delete Bounced Addresses
Automatically removes email addresses that have bounced.
To configure:
- Check the box to enable Auto-Delete Bounced Addresses
- In the Days after bounce field, enter the number of days to wait before deletion (e.g., 10)
- (Recommended) Check Add to suppression list before deletion to prevent these addresses from being re-imported
Suppression option: Highly recommended to enable. Bounced addresses rarely recover and will damage your sender reputation if re-imported.
Auto-Delete Unsubscribers
Automatically removes unsubscribed contacts after a retention period, helping with maintaining a clean list.
To configure:
- Check the box to enable Auto-Delete Unsubscribers
- In the Days after unsubscribe field, enter the number of days to retain before deletion (e.g., 30)
- (Recommended) Check Add to suppression list before deletion to ensure unsubscribe requests are honored even if contacts are re-imported
Suppression option: Highly recommended to enable. This ensures that even if an unsubscribed contact is accidentally re-imported from a CRM or other source, they will not receive emails.
Understanding the Suppression List
The suppression list is a permanent record of email addresses that should not receive your campaigns, even if they are re-added to your lists.
Saving Your Changes
- Click Save when you have finished configuring your security settings.
- Alternatively, click Cancel to return to the previous screen without saving your changes.
Note: Changes to auto-delete settings take effect with the next scheduled maintenance run (typically daily). Existing contacts that meet the criteria will be processed according to your new settings.