Design Tools
The Design Tools allow you to edit every aspect of your HTML document.
Note: Not all fields are available for all documents.
WYSIWYG HTML Design Tools
| Undo | Click this to undo the last change you made to the document. | |
| Redo | Click this to repeat the last change you made to the document. | |
| Formats | Select the heading style that you want to use for the selected text. | |
| Fonts | Select the font family that you want to use for the selected text. | |
| Font Sizes | Select the font size that you want to use for the selected text. | |
| Bold | Click this to bold the selected text or, if the text is already bolded, to remove bolding. | |
| Italic | Click this to italicise the selected text or, if the text is already italic, to remove the italics. | |
| Underline | Click this to underline the selected text or, if the text is already underlined, to remove the line. | |
| Strikethrough | Click this to add a horizontal line through selected text or, if the text has already a horizontal line, to remove it. | |
| Align Left | Select text in the document and then click this to align the text to the left side of its text box. | |
| Align Center | Select text in the document and then click this to align the text to the center of its text box. | |
| Align Right | Select text in the document and then click this to align the text to the right side of its text box. | |
| Justify | Select text in the document and then click this to align the text to both the left and right sides of its text box. | |
| Bullet List | Click this to insert a bulleted list. If you select paragraphs already in the document and click this, the text is converted to a bulleted list. | |
| Numbered List | Click this to insert a numbered list. If you select paragraphs already in the document and click this, the text is converted to a numbered list. | |
| Decrease Indent | Select text and click this to decrease the space between the text and the left side of its text box. | |
| Increase Indent | Select text and click this to increase the space between the text and the left side of its text box. | |
| Text Color | Select text and click this to assign the color that displays to the text. To view a color picker, click the triangular icon next to the button. Click a color to assign the color to the text. If you want to use a color that does not display in the list, click If you want to remove the text color, highlight the text and click | |
| Background Color | Select this and click this to highlight the text. Highlighting text adds a colored background to the text. To view a color picker, click the triangular icon next to the button. Click a color to assign the color to the text background. If you want to use a color that does not display in the list, click If you want to remove the background color, highlight the text and click | |
| Table | Click this, select Table and move the cursor to select the number of columns and rows you need. See Creating and Editing Tables for more information. | |
| Special Character | Click this to insert a non‐standard character. Select the character that you want to insert in the window that displays. | |
| Emoticons | Click this to insert emoticon(s) on your email content. | |
| Preview | Click this to see what your email would like when you send them to your contacts. | |
| Insert/edit image | Click this to upload an image to the Interspire Email Marketer server and insert it at the insertion point. Select an existing image to edit its properties. See Inserting and Editing Images for more information. | |
| Insert/edit media | Click this to upload media to your email content. See Inserting and Editing Media for more information. | |
| Insert template | Click this to insert a template. | |
| Insert/edit link | Select text, then click this to turn the text into a hyperlink. The Link screen displays. See Inserting and Editing Links for more information. | |
| Anchor | Click this to insert an anchor at the insertion point. Select an existing anchor and click this to edit the anchor’s name. A window displays. Enter the new Anchor Name and click Save. | |
| Insert/edit code sample | Click this to insert a code sample. Choose the language from the dropdown list, enter the code sample you want to be included in your email, and click Save. | |
| Source code | Click this to view or edit source code, and click Save. Source code is generated based on the files, images, or media you include in your document. | |
| Custom Fields | Click this to insert a custom field you have already created. The custom field you select is added to your document at the insertion point See Inserting Custom Fields for more information. | |
| Dynamic Content Tags | Click this to insert a dynamic content tag from your list. See Inserting Dynamic Content Tags for more information. | |
| Survey Link | Click this to insert a survey link. See Inserting Surveys for more information. |
When you highlight texts inside the HTML content, a shortcut of other HTML Design Tools will display.
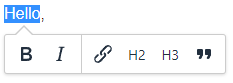
Other HTML Design Tools
Other HTML Design Tools: WYSIWYG
| Bold | Click this to bold the selected text or, if the text is already bolded, to remove bolding. | |
| Italic | Click this to italicise the selected text or, if the text is already italic, to remove the italics. | |
| Insert/edit link | Select text, then click this to turn the text into a hyperlink. The Link screen displays. See Inserting and Editing Links for more information. | |
| Header 2 | Select text, then click this to turn the text into a Header 2. The text will change its font and size. | |
| Header 3 | Select text, then click this to turn the text into a Header 3. The text will change its font and size. | |
| Blockquote | Select text, then click this to turn the text into a blockquote. The text will have indention in the right and left margins. |
Creating and Editing Tables
In HTML, tables allow you to arrange information in horizontal rows and vertical columns.
- To insert a table, access the HTML editor (see Using the HTML Editor). Place the insertion point where you want the table to appear, then click the Table functions button and select Table. The Insert table screen displays, (see Inserting and Editing a Table). You can also resize tables, and add rows and columns.
- To modify a table, access the HTML editor. Select the table you want to edit, then click the Table Functions button.
Table Display
| Table Function | Click this and move the cursor to select the number of rows and columns you need. |
| Cell | Click this to modify cell properties, merge cells, and split cells. |
| Row | Click this to insert and delete rows, to modify row properties, and to cut, copy and paste rows. |
| Column | Click this to insert and delete columns, to modify column properties, and to cut, copy and paste columns. |
| Table Properties | Click this to modify overall table properties. |
| Delete Table | Click this to delete the whole table. |
Inserting and Editing a Table
Take the following steps to insert a table in your email content:
- In the HTML editor, click the Table functions button, select Table and move the cursor to select the number of rows and columns you need.
- If you want to edit the table, click inside the table created to show the icons for editing.

Editing Table Shortcuts
Editing Table Shortcuts
| Click this to be directed to Table Properties. | |
| Click this to delete the whole table. | |
| Click this to add a row above the current row you are working on. | |
| Click this to add a row below the current row you are working on. | |
| Click this to delete the entire row you selected. | |
| Click this to add a column before the current column you are working on. | |
| Click this to add a column after the current column you are working on. | |
| Click this to delete the entire column you selected. |
Modifying Table Properties
Take the following steps to change the properties of an existing table in a document:
- In the HTML editor, click inside the table and select the
 icon. Or click the button
  and select Table Properties.
 - You will be directed to edit the General Table Properties.
- Define the Width of your table. You can define the table width in pixels by entering an integer (for example,“150”), or as a percentage of the recipient’s browser window by entering a percentage (for example,“75%”).
- Define the Height of your table, if required. As with the Width, enter an integer to define the table height in pixels, or enter a percentage value to define the table height as a percentage of the recipient’s browser window. If you leave this value blank, the table’s default height is equal to the text height, plus cell padding and spacing for each row, multiplied by the number of rows.
- Enter the number of Cell Spacing pixels you want to give your table. Cell spacing inserts space between the cells in your table.
- Enter the number of Cell Padding pixels you want to give your table. Cell padding inserts space between the edges of each table cell and the text inside the cell.
- If you want your table to have a Border, specify its width. If you want a table with no borders, enter “0” in this field.
- Tick the checkbox if you want to show the caption of your table.
- In the Alignment list, select how you want the table to be displayed in its container.
- Select Left to have the table display at the left‐hand margin.
- Select Right to have the table display at the right‐hand margin.
- Select Center to have the table display in the middle of the container
- If you chose to have a border, click Advanced to modify it.
- Select a Border Style to have the table display using the selected style.
- Click
 in the Border color field and select a color to assign to the border.
 - Click in the Background color field and select a color background to assign to the border.
If you want to use a color that does not display in the list, click
 . An advanced color picker displays. Select the color you want to use.
If you want to remove the border or the background color, highlight the text and click
. An advanced color picker displays. Select the color you want to use.
If you want to remove the border or the background color, highlight the text and click  .
. - Click Save. Your table displays in the HTML editor. Alternatively, click Cancel to close the Table Properties screen without making any changes.
Modifying Cell Properties
Take the following steps to change the properties of a cell in an existing table in a document:
- In the HTML editor, click inside the cell you want to modify.
Note: Interspire Email Marketer supports the modification of one cell at a time.
- Click the Table functions button and select Cell, then Cell Properties. The General Cell Properties screen displays.
- Enter the Width and Height, if required. The Width and the Height fields will only affect one cell you selected or highlighted.
- The Cell type field will let you choose if the properties you are modifying is for a Specific Cell or for a Header Cell.
- The Scope field will let you edit the height per scope:
- None - select this to modify only a specific cell within your table.
- Row - select this to modify the cells within the same row as the selected cell field.
- Column - select this to modify the cells within the same column as the selected cell field.
- Row group - select this to modify the cells within the same row group as the selected cell field.
- Column group - select this to modify the cells within the same column group as the selected cell field.
- In the Horizontal align list, select how you want text or images to display in the selected cell.
- Select Left to have the text or image display at the left‐hand cell margin.
- Select Right to have the text or image display at the cell’s right‐hand margin.
- Select Center to have the text or image display in the horizontal middle of the cell.
- In the Vertical align list, select how you want text or images to display in the selected cell.
- Select None to have the text or image display in its default vertical location.
- Select Top to have the text or image display at the upper cell margin.
- Select Middle to have the text or image display at the vertical middle of the cell.
- Select Bottom to have the text or image display at the bottom cell margin.
- If you chose to have a border, click Advanced to modify it. If you do not want to add a border, click Save. Alternatively, click Cancel to close the Table Properties screen without making any changes.
- Define the width of your cell(s) in the Border Width field.
- Select a Border Style to have the table display using the selected style.
- Click in the Border color field and select a color to assign to the border.
- Click in the Background color field and select a color background to assign to the border.
If you want to use a color that does not display in the list, click . An advanced color picker displays. Select the color you want to use.
If you want to remove the border or the background color, highlight the text and click .
- Click Save. Your table displays in the HTML editor. Alternatively, click Cancel to close the Table Properties screen without making any changes.
Merging and Splitting Cells
Take the following steps to merge cells:
- In the HTML editor, select the cells you want to merge. Highlight and move your cursor to select multiple cells or start with one cell, holding Shift, then use arrows to select.
- Click the Table Functions button, then select Cell, and click Merge cells. The merge cells are displayed in the HTML editor.
Take the following steps to split cells:
- In the HTML editor, select the merged cells you want to split.
- Click the Table Functions button, then select Cell, and click Split cell. The split cells are displayed in the HTML editor.
Inserting and Deleting Rows
Take the following steps to add a row to a table in a document:
- In the HTML editor, select a table cell above or below which you want to add a row.
- Click the Table functions button. Select Row, then Insert row before or Insert row after. The new row displays in the HTML editor.
- Alternatively, you can also use the icons to insert rows. See Table Editing Shortcuts.
Take the following steps to delete a row from a table in a document:
- In the HTML editor, select a table cell in the row you want to delete.
- Click the Table functions button. Select Row, then Delete Row. The selected row is deleted from the table.
- Alternatively, you can use the icons to delete rows. See Table Editing Shortcuts.
Modifying Row Properties
Take the following steps to change the properties of row(s) in an existing table in a document:
- In the HTML editor, click inside a cell of the row you want to modify.
- Click the Table functions button and select Row, then Row properties. The General Row Properties screen displays.
- In the Row Type list, select how you want the table to display the selected row(s).
- Select Header to have the row(s)
- Select Body to have the row(s)
- Select Footer to have the row(s)
- In the Alignment list, select how you want the table to display in the selected rows.
- Select Left to have the entire row’s text or image display at the left‐hand cell margin.
- Select Right to have the entire row’s text or image display at the cell’s right‐hand margin.
- Select Center to have the entire row’s text or image display in the horizontal middle of the cell.
- Enter the Height, if required. The Height field will affect the entire row of the cell you selected or highlighted.
- If you chose to have a border for the row you selected, click Advanced to modify it. If you do not want to add a border, click Save. Alternatively, click Cancel to close the Table Properties screen without making any changes.
- Select a Border Style to have the row display using the selected style.
- Click in the Border color field and select a color to assign to the border.
- Click in the Background color field and select a color background to assign to the border.
If you want to use a color that does not display in the list, click . An advanced color picker displays. Select the color you want to use.
If you want to remove the border or the background color, highlight the text and click .
- Click Save. Your table displays in the HTML editor. Alternatively, click Cancel to close the Table Properties screen without making any changes.
Inserting and Deleting Columns
Take the following steps to add a row to a table in a document:
- In the HTML editor, select a table cell from the right or left which you want to add a column.
- Click the Table functions button. Select Column, then Insert column before or Insert column after. The new column displays in the HTML editor.
- Alternatively, you can also use the icons to insert columns. See See Table Editing Shortcuts.
Take the following steps to delete a column from a table in a document:
- In the HTML editor, select a table cell in the column you want to delete.
- Click the Table functions button. Select Column, then Delete Column. The selected column is deleted from the table.
- Alternatively, you can use the icons to delete rows. See See Table Editing Shortcuts.
Cutting, Copying and Pasting Columns
Take the following steps to cut a column in the table:
- In the HTML editor, select a column you want to cut.
- Click the Table functions button. Select Column, then Cut column .
Take the following steps to copy a column in the table:
- In the HTML editor, select a column you want to copy.
- Click the Table functions button. Select Column, then Copy column .
Take the following steps to paste a column in the table:
- In the HTML editor, select a column before or after you want your copied or cut row to be pasted.
- Click the Table functions button. Select Column, then Paste column before or Paste column after. The edited column displays in the HTML editor.
Previewing Your Email
To see how your email will display in the recipient’s email client, click the Preview icon in the Design Tools section.
Note: To ensure that your email displays correctly in all popular HTML email clients, it is strongly advised that you use the Email validation feature as well as the Preview screen. See Validating an Email.
Inserting and Editing Images
Use the Images screen to insert or edit an image in your document.
- To insert an image, access the HTML editor (see HTML Editor). Place the insertion point where you want the image to appear, then click the Insert or edit image button
 .
. - To edit an image, access the HTML editor. Select the image you want to edit, then click the icon you want to use to modify it.
Inserting Images
- Place the insertion point where you want the image to appear, then click the Insert or edit image button .
The following table discusses the function of the fields in the General Insert/Edit Image screen.
| Source | This will display the link of the image you will be using. |
| Click this upload or search for the image you want to insert. | |
| Alternative Description | You can rename or describe the image. |
| Width | This will display the image width. |
| Height | This will display the image height. |
| Click this to constrain the properties of your selected image. |
- Click the upload button to start searching for the image you want to use.
Images in your documents must be uploaded to the Interspire Email Marketer server via Image Manager
The following table discusses the fields under the Image Manager.
Uploading Images
| Click this to show options in uploading an image. | |
| Click this to be directed to the images you have saved in Interspire’s Image Manager. | |
| Click this to upload images that are not yet saved in Interspire’s Image Manager. Images saved under this screen will be used and saved for the current email campaign. If you want to save images that you want to use for different campaigns or purposes, save them in Interspire’s Image Manager. | |
| Click this to search for an image/s from your files. You can select multiple images simultaneously. | |
| Click this to start uploading all the image/s you have selected from your files. | |
| Click this to return to the files list after uploading is complete. | |
| Click this to display your images in a box view. | |
| Click this to display your images in a list view. | |
| Filters | Enter the title or name of the image you are looking for. |
| Click this to sort the images by Filename, Date, Size and Type. | |
| Click this to sort the images by Filename, Date, Size and Type. |
- Select the image you want to use from Image Manager or the newly uploaded image.
- Enter an alternative description you want to use.
- Define the width of your selected image in the Width field and the height of it in the Height field.
Note: These fields are configured automatically when you select or load an image; you do not need to change it if you do not want to resize the image.
- To add a border to your image, click Advanced.
- The Style field will be automatically filled-up after choosing from the drop-down list of Border style.
- Enter in the Vertical space field the amount of empty space above and below the image in pixels.
- Enter in the Horizontal space field the amount of empty space to the left and right of the image in pixels.
- Specify the border width of your image. If you want an image with no borders, enter “0” in the Border width field.
- Click Save to save the changes you have made. Alternatively, click Cancel to proceed without making changes.
Editing Images
- Select the image you want to edit to display shortcuts to image-related design tools. Then click the icon you want to use to modify it.
Edit Image Shortcut
| Rotate counterclockwise | Click this to rotate the image counterclockwise. | |
| Rotate clockwise | Click this to rotate the image clockwise. | |
| Flip vertically | Click this to flip or mirror the image vertically. | |
| Flip horizontally | Click this to flip or mirror the image horizontally. | |
| Edit Image | Click this to edit the image. The Edit Image screen appears. | |
| Image options | Click this to go to the General Insert/Edit Image screen. | |
| Align left | Click this to align the image to the left side of the document. | |
| Align center | Click this to align the image to the center of the document. | |
| Align right | Click this to align the image to the right of the document. |
-
To edit the image, click
 . The Edit Image screen displays.
In this screen, you can:
. The Edit Image screen displays.
In this screen, you can:- Crop the image.
- Resize the image.
- Adjust the image on your preference.
- Adjust the brightness of the image.
- Adjust the sharpness of the image.
- Adjust the contrast level of the image. RGB refers to red, G to green and B to blue.
- Adjust the luminance of the image.
- Apply a negative effect to the an image.
-
Click Apply to have the edits you made reflect on the image. Click the x button, the Back button, or the Cancel button to proceed without making changes and return to the Edit Image Screen.
-
Click Save to save the changes you have made. Alternatively, click Cancel to proceed without making changes.
Inserting and Editing Media
- To insert a media, access the HTML editor (see HTML Editor). Place the insertion point where you want the media to appear, then click the Insert or edit a media button (
 ).
). - Enter the source of the media you want to insert in your document.
- Define the width of your media in the Width field and the height of it in the Height field.
- The embed is automatically generated once you entered the URL in the Source field.
- Select Advanced if you want to add: Alternative source URL Media poster (Image URL)
- Click Save to save the changes you have made. Alternatively, click Cancel to proceed without making changes.
Inserting and Editing Links
Use the Insert/Edit Link screen to create and edit hyperlinks that allow recipients of your email to click through to web pages on the Internet or files stored on the Interspire Email Marketer server.
Note: For information on links that allow a recipient to send an email, see Inserting and Editing Email Links.
To access the Insert/Edit Link screen, click the Insert/edit Link (![]() ) icon in the HTML editor.
) icon in the HTML editor.
- If you want to link to an existing web page on the Internet, enter the full URL in the URL field.
- If you want to link to an image, click and search the image you want to use or access your Image Manager. See Inserting and Editing Images.
The following table describes the labels not discussed in the above‐mentioned sections.
The Link Screen
| URL | This will display the link of the image you will be using. |
| Click this upload or search for the image you want to use as an image link. | |
| Text to display | Displays the text for the link. |
| Title | Displays the title of the link.This can be left blank. |
| Open link in… | Choose the option in opening the link: Current Window or New Window. |
- Click Save to save the changes you have made. Alternatively, click Cancel to proceed without making changes.
- To remove the link, select the text and double click, the shortcut of link icons will display. Select
 , then click the remove link icon (
 ). The selected text in your document will retutn to its default state.
Inserting and Editing Email Links
Use the Insert/Edit Link screen to create and edit links that recipients can click to send an email to the address that you specify. Email links use the HTML mailto command. Take the following steps to create or edit an email link:
- To create a new email link in your document, select text in the HTML editor (see HTML Editor) and click the Insert/Edit Link button ().
To edit an existing email link, select the link in the document and click the Insert/Edit Link button.
The Insert/Edit Link screen displays.
-
Enter the Email Address to which you want the email to be sent.
-
If you want to specify the email subject (for example, “Response to Newsletter #15”),enter the subject line in the Subject field.
-
If your document has styles defined, you can select a Style to have the link display using the selected style.
-
Click Insert Link to place the email link in your document.
Alternatively, select the text and click the Insert/Edit Link icon, remove the URL and click Save to return the selected text in your document to its default state.
Click Cancel to close the Insert/Edit Link screen without saving any changes.
The email link displays in the HTML editor.
Composing and Editing HTML
To edit your document’s HTML code manually:
- Click the Source code icon.
- Click Save to save the changes you have made. Alternatively, click Cancel to proceed without making changes.
Inserting Custom Fields
Custom fields allow you to include recipient‐specific variables in your email campaigns, without manually configuring each email. This is similar to the mail merge feature available in some word processing, spreadsheet and database applications.
Custom fields use variables that refer to information configured and listed elsewhere. The information contained in most variables is different for each subscriber (“contact’s email address”, for instance).
You can also define variables that are specific to each contact list.
Custom field variables are identified in the editor by the pair of percentage symbols to right and left of the variable name. For instance, if you define a ” city ” custom field, the variable appears in your document as ” %%city%% ”.
Take the following steps to insert a custom field into your document:
-
In the HTML editor, place the insertion point where you want the custom field to display. Click Insert a custom field.
The General custom fields that display are standard fields built into Interspire Email Marketer.
General custom fields relating to your company are specific to each contact list. For example, you can specify different contact phone numbers for different contact lists. Define these fields in the Contact lists > Create a contact list screen, or the Contact lists > View contact lists > Edit screen, for each contact list.
The other custom fields that display are those you created yourself, and are arranged by the contact list with which they are associated. Click a contact list name to see the fields with which it is associated. If a custom field is associated with more than one contact list, it appears in both lists.
The following table describes the built‐in General custom fields:
General Custom Fields
| Contact list name | %%listname%% | The name of the contact list to which the contact belongs. |
| Unsubscribe link | %%unsubscribelink%% | A hyperlink recipients can click to remove themselves from the contact list. |
| Contact’s email address | %%emailaddress%% | The email address to which the email is sent. |
| Email confirmation link | %%confirmlink%% | A hyperlink recipients can click to confirm that they want to receive your emails. |
| Subscribe date | %%subscribedate%% | The date on which the contact was added to the contact list. |
| Link to web version of this email | %%webversion%% | A hyperlink recipients can click to see the HTML version of the email, stored on the Interspire Email Marketer server. |
| Link to contact list archive | %%mailinglistarchive%% | A hyperlink recipients can click to see the HTML versions of all emails sent to the contact list to which they belong, stored on the Interspire Email Marketer server. |
| Company name | %%companyname%% | Your company’s name. |
| Company address | %%companyaddress%% | Your company’s address. |
| Company phone number | %%companyphone%% | Your company’s telephone number. |
Inserting Dynamic Content Tags
Take the following steps to insert a dynamic content tag into your document:
-
In the HTML editor, place the insertion point where you want the dynamic content tag to display. Click the Dynamic Content Tags button.
The options of the dynamic content tags that display are based on the tags that you have created into Interspire Email Marketer. See Dynamic Content Tags for more information.
-
Select the dynamic content tag you want to use. The selected dynamic content tag displays in the HTML editor.
-
To remove the dynamic content tag, highlight the text and click Delete.
Inserting a Survey Link
Take the following steps to insert a survey link into your document:
- In the HTML editor, place the insertion point where you want the survey link to display. Click the Survey Link button.
- Select the survey you want to use and click the Insert Survey Link button to have it inserted in your document.
- Click Cancel to proceed without adding the survey link.
- To remove the survey link, highlight the text and click Delete.