Email Campaigns
This chapter describes the Email Campaigns menu in the navigation bar.
Email Campaigns Overview
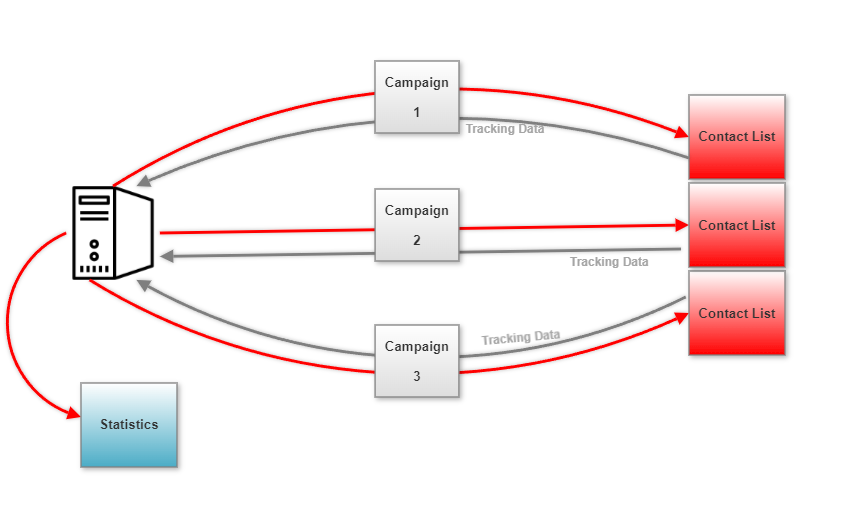
Email campaigns are the emails you send out to your contacts.
Each email campaign you plan, create, and send out transmits an email, based on an HTML or plain-text template (or both), to each of the addresses stored in the contact list you select (see Contact Lists).
Archiving Email Campaigns
When you archive email campaigns, all emails sent to a contact list are available on the Internet, and can be viewed by campaign recipients in the contact list. To set this up:
- Archive the email campaigns by clicking the Archive field in the View email campaigns screen, or use the Create an email campaign screen
- Include a link to the archive (using the %%mailinglistarchive%% variable) in the email campaigns you send to the contact list
Activating Email Campaigns
Only activated email campaigns may be sent. This means that an administrator can assign specific permissions to different users that allow one user to design a campaign, and another to authorize it.
Split Testing Email Campaigns
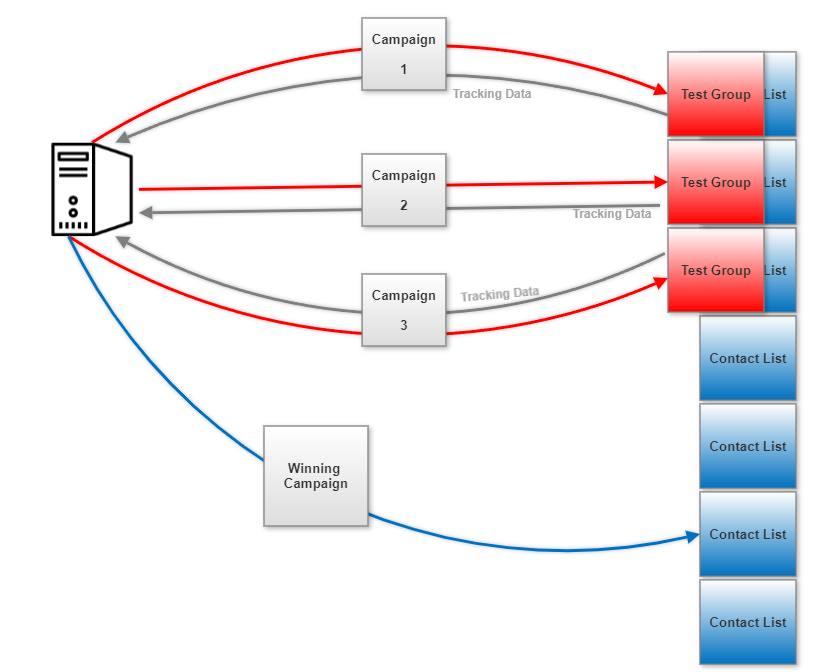
Split testing, also known as “A/B testing”, is a scientific method of testing your email campaigns’ effectiveness using statistical analysis.
In a normal campaign send, you send one email to your whole contact list. With split testing, you “split” your contact list into different parts and send a different email campaign to each part. Then, you can see how well each email performed and select the most effective.
Split testing is essentially a competition between email campaigns, where:
- The losers are discarded
- The winner is used in future campaigns
- You select the criteria to judge the winner (open rate or click-through rate)
- Interspire Email Marketer tracks each email’s performance and decides the winner
Split tests are usually performed on variations of the same basic email campaign, not vastly different emails. For example:
- Good Split Test: Two identical emails with slightly different subject lines to test which gets opened more
- Poor Split Test: Comparing a seasonal discount email vs. a free holiday offer - this won’t produce meaningful results
While “A/B testing” suggests testing between two emails, Interspire Email Marketer allows testing any number of emails simultaneously for detailed and efficient comparisons.
Manual and Automatic Split Testing
Interspire Email Marketer supports both manual and automatic split testing:
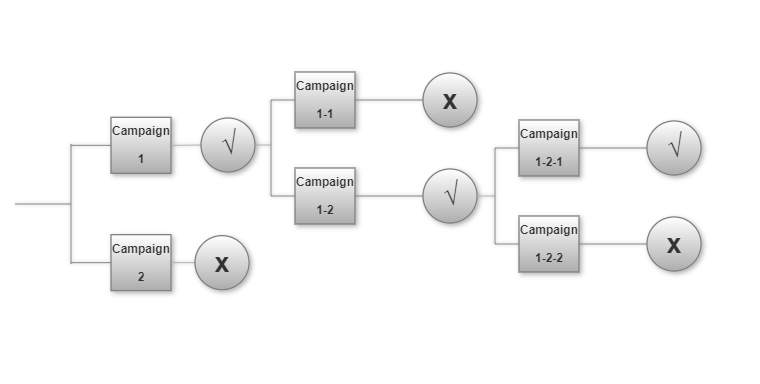
Manual Split Testing
- Interspire Email Marketer sends all test emails and tracks performance
- No cut-off time
- You view effectiveness in Statistics > Split test statistics
- You decide what to do with the winning email:
- Use it for your next campaign
- Send it to another contact list
- Perform further split tests on variations
Here’s an example of multi-level split testing to refine effectiveness:
Automatic Split Testing
- Test emails go to a defined percentage of your contact list
- You set the test duration
- After the duration elapses:
- Interspire Email Marketer declares a winner based on your chosen criterion
- Automatically sends the winning email to the remaining contacts
Split Testing Tips
If you’re new to split testing, here are some helpful tips:
-
Don’t “compare apples and oranges”
- Test variations of one email, not completely different emails
- Split testing helps fine-tune your marketing, not make broad strategy decisions
-
Keep it simple
- Test one feature at a time for meaningful results
- Example: Test emails that differ only in font colors or subject lines
- Don’t test multiple variations simultaneously (subject line, design, and body text)
- Create separate campaigns for each variation when testing multiple elements
-
Include a “control”
- Always include the original, unchanged version of the email
- Compare new variations against the control email sent at the same time
- Don’t compare against past campaign results which could be affected by timing variables
-
Use a large test group
- Larger test groups provide more accurate and reliable results
- Similar to other statistical analyses like political polls
-
Use the correct metric
- Choose between open rates or click-through rates based on what you’re testing
- Subject line tests: Use open rates
- Design tests: Use click-through rates (since design isn’t visible until after opening)
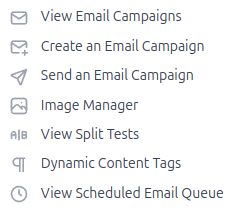
Managing Email Campaigns
Viewing Email Campaigns
To view your existing email campaigns:
- Click Email campaigns in the navigation bar
- Click View email campaigns
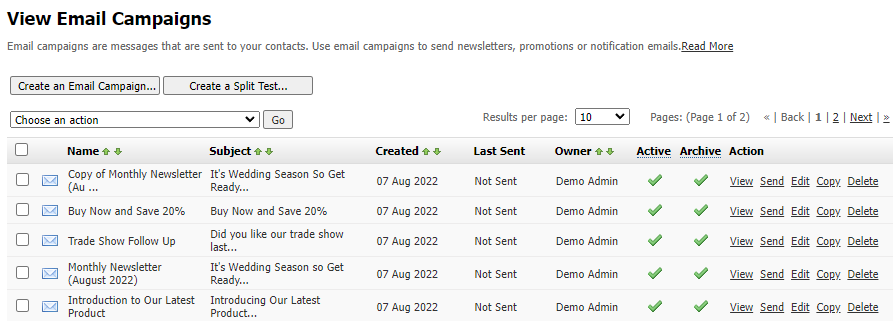
Available actions:
- Create an email campaign
- Delete campaigns
- Archive/Unarchive campaigns
- Activate/Deactivate campaigns
- View, send, edit, copy campaigns
Email Campaign List Options
| Option | Description |
|---|---|
| Create an email campaign | Start building a new campaign |
| Create a split test | Configure a new split test |
| Choose an action | Select campaigns and an action to perform |
| Select campaigns for bulk actions | |
| Name | Campaign name |
| Subject | Email subject line text |
| Created | Creation date |
| Last sent | Last send date or “Not sent” |
| Email format | HTML, Text, or HTML and text |
| Active | |
| Archive | |
| Action | View, Send, Resend, Edit, Copy, Delete |
Creating Email Campaigns
Email campaigns are typically based on templates. You can:
- Customize a template for your campaign
- Create a campaign without a template
- Build using the text/HTML editor
- Import HTML from your computer/web page
To create a campaign:
- Click Email campaigns > Create an email campaign
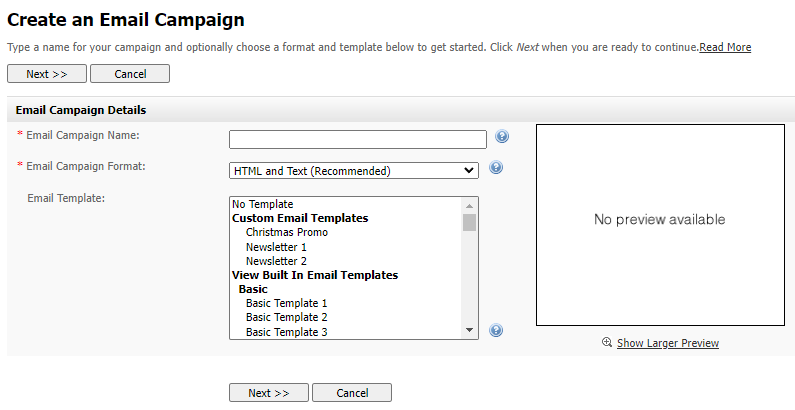
-
Configure basic settings:
- Enter campaign name
- Select format (HTML and Text, Text only, or HTML only)
- Choose a template or select “No template”
-
Build your email content:
- Use the WYSIWYG editor
- Upload an HTML file
- Import from a website
- Customize using HTML and text editors
-
Check for spam triggers:
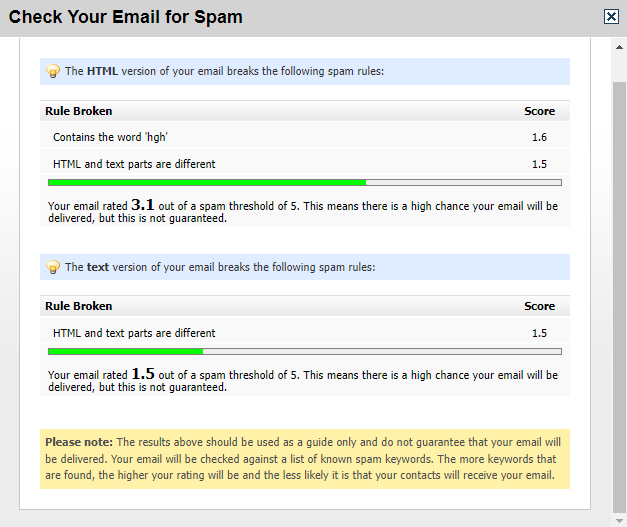
- Click “Check your email for spam”
- Edit any flagged content
- Close the window using

-
Configure options:
- Set campaign status (active/inactive)
- Enable/disable archiving
- Send test emails
- Preview in different email clients
-
Save your campaign:
- “Save & keep editing” to continue making changes
- “Save and exit” to finish
- “Cancel” to discard changes
Sending Email Campaigns
To send a campaign:
- Click Email campaigns > Send email campaign
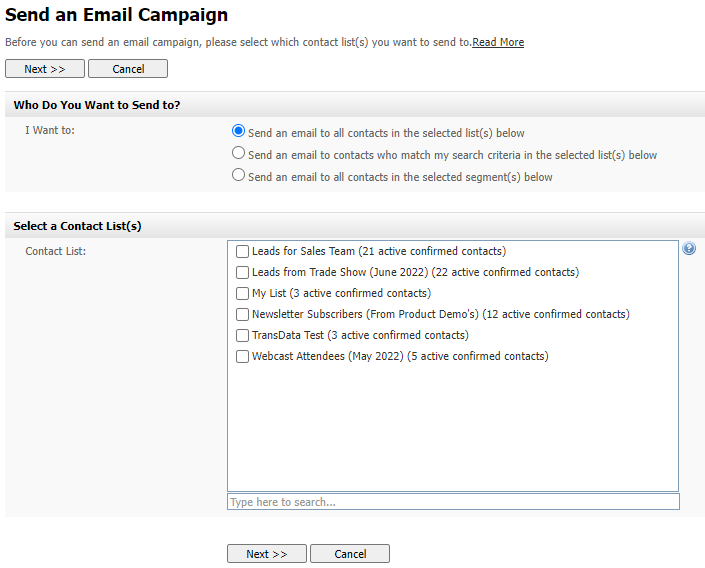
-
Select recipients:
- Entire contact list
- Contacts matching search criteria
- Specific segments
-
Configure campaign settings:

Settings include:
- Campaign selection
- Sender information
- Scheduling options
- Advanced settings:
- Custom field mapping
- Multipart email options
- Tracking settings
- Google Analytics integration
- Image handling
- Review the campaign report:
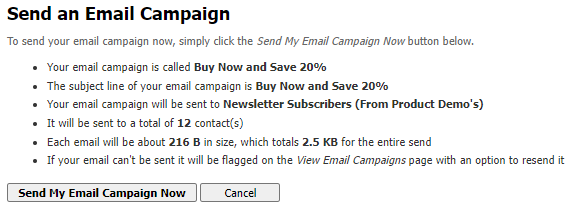
- Schedule or send:
- If scheduling enabled: Campaign added to queue
- If scheduling disabled: Campaign sends immediately
Note: Don’t close the sending window until the campaign completes to ensure proper delivery.