

BuilderJS Editor
BuilderJS is Interspire Email Marketer’s modern, self-hosted drag-and-drop email editor. It lets you assemble responsive, inbox-ready emails visually by dragging content blocks onto the canvas, without writing HTML. Unlike Unlayer, which is loaded remotely, BuilderJS runs entirely on your own server, so your content never leaves your installation.
In version 8.7.5, BuilderJS was upgraded to its latest major version for a more reliable and responsive editing surface. See BuilderJS Improvements for a summary of what changed. v8.7.5
In version 8.8.0, typography controls in the Text panel — font size, font family, weight, colour, alignment, line height, letter spacing and heading level — apply to the text you are editing. Designs stay within the width of the editing surface, and saved designs reopen for further editing. v8.8.0
When to Use BuilderJS
BuilderJS is available when creating email campaigns (newsletters), email templates, and autoresponders. It is recommended for users who want a modern visual builder that is fully self-hosted. For a comparison of all available editors, see Creating and Editing Emails.
⚠️ Editor selection is permanent per item. Once a newsletter, template, or autoresponder is created with BuilderJS, you cannot switch it to another editor. Choose your editor before you start building.
Choosing BuilderJS and a Starting Layout
Select the editor on the first step of the create screen. In Email Campaigns > Create an Email Campaign, name your campaign, choose a format, then set Email Template to BuilderJS.
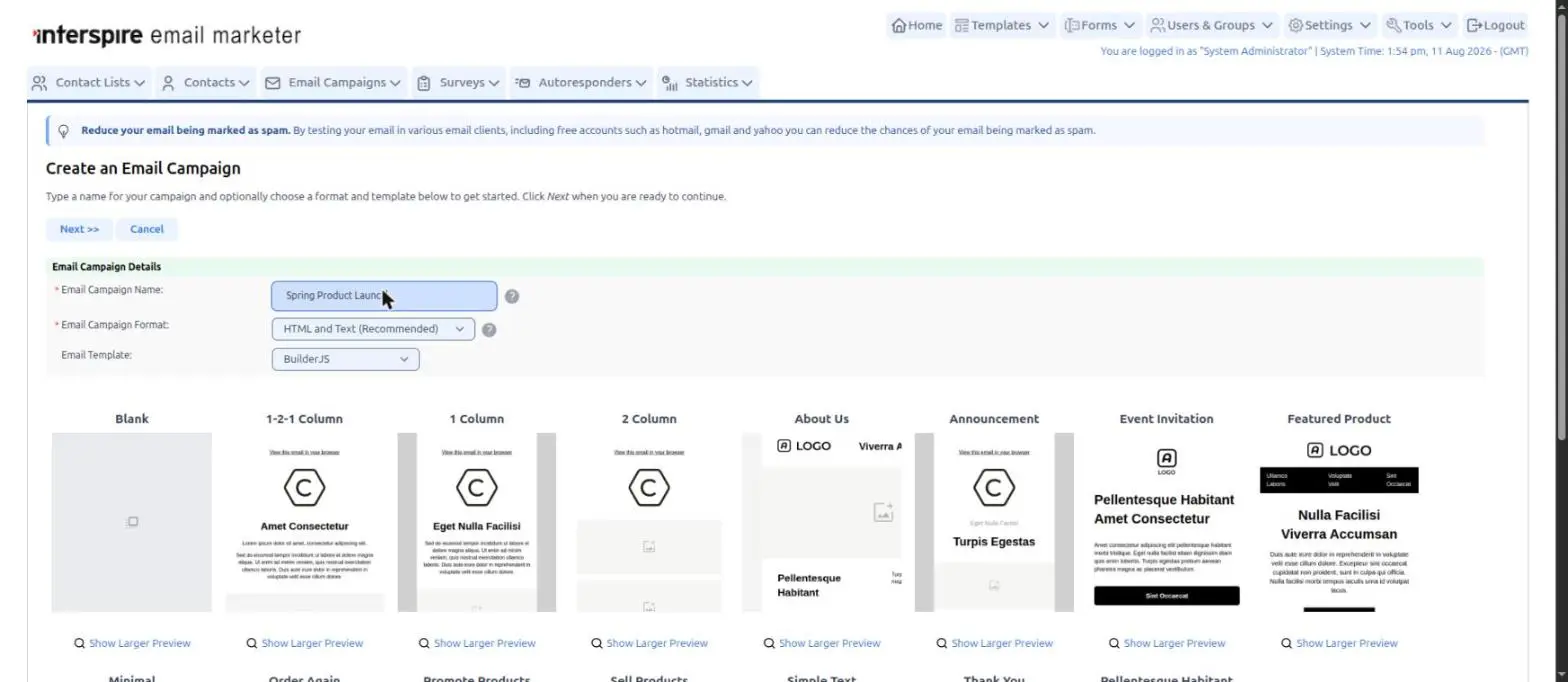
Choosing BuilderJS on the Create an Email Campaign screen
The gallery below the drop-down updates to show the layouts available for the selected editor. Click a thumbnail to choose it, or click Show Larger Preview to inspect it full size before committing. When you are ready, click Next.
Starter Templates
BuilderJS ships with 15 drag-and-drop starter layouts — a Blank canvas plus 14 designed layouts covering common use cases such as welcome emails, product promotions, event invitations, and thank-you messages:
| Structural layouts | Designed layouts |
|---|---|
| Blank | About Us |
| 1 Column | Announcement |
| 2 Column | Event Invitation |
| 1-2-1 Column | Featured Product |
| Minimal | |
| Order Again | |
| Promote Products | |
| Sell Products | |
| Simple Text | |
| Thank You | |
| Welcome |
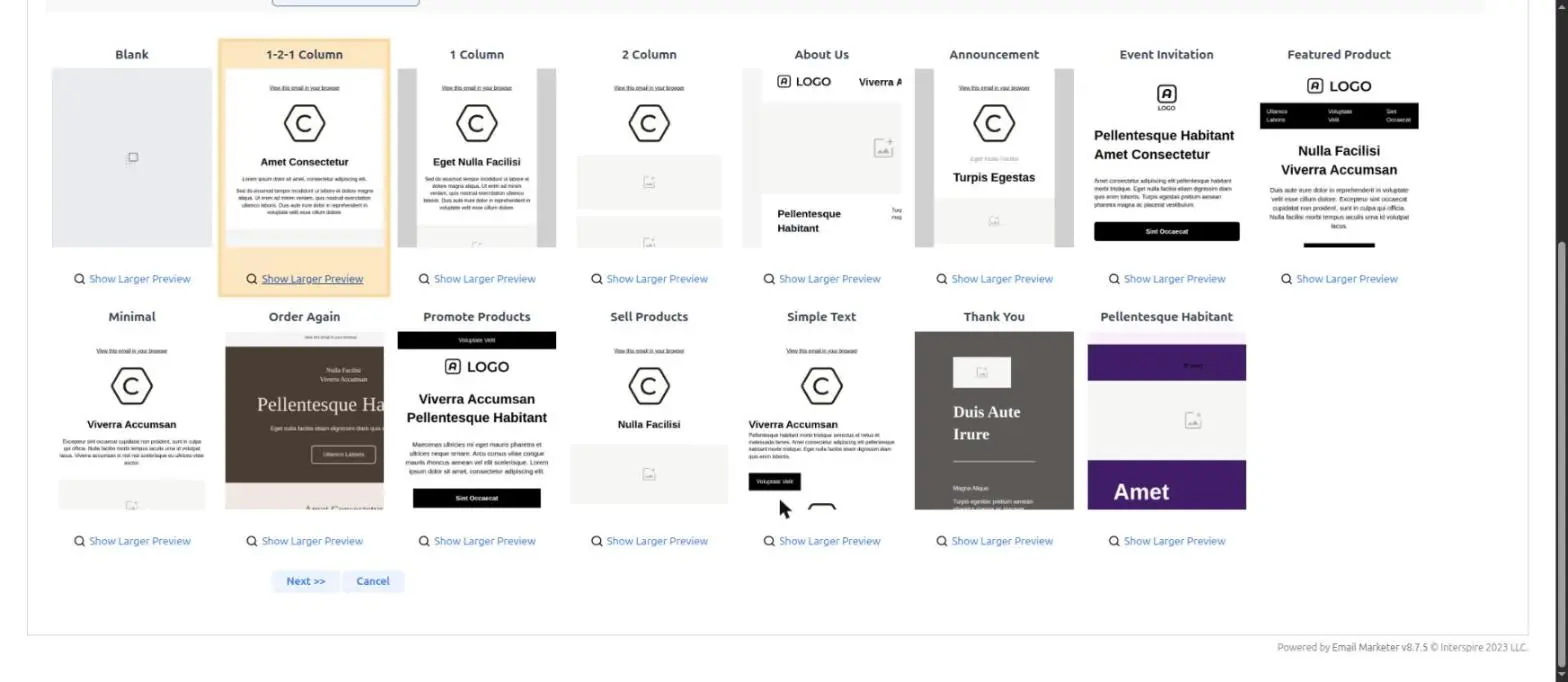
BuilderJS starter template gallery
Starting from one of these gives you a professionally structured layout that you can customize block by block. See Templates for more information on the bundled template library.
The Content Step
After you click Next, the content step shows your subject line, pre-header and the BuilderJS content area. Rather than embedding the builder directly in the admin page, Interspire shows a live preview of your email with a small toolbar above it.
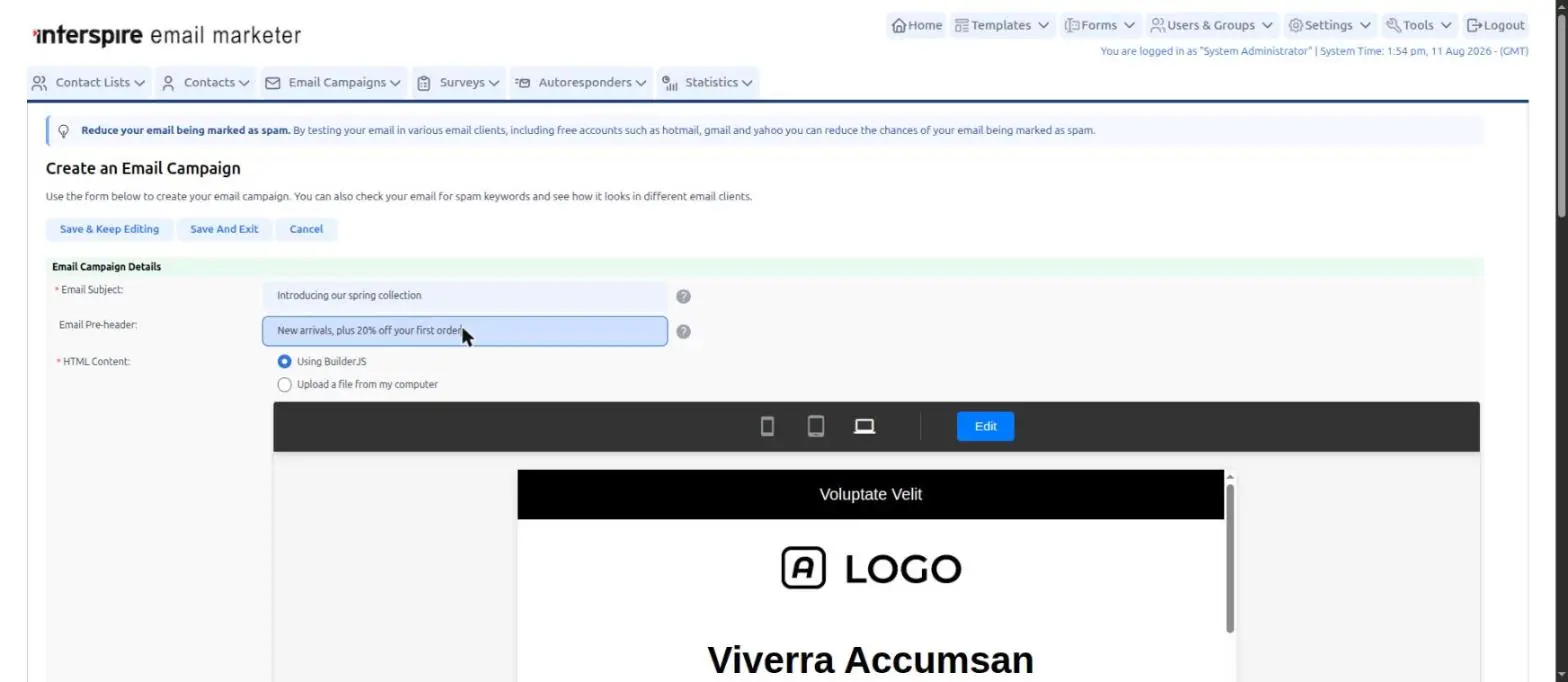
The content step, with the BuilderJS preview and Edit button
The toolbar gives you:
- Mobile, Tablet and Desktop buttons that re-render the preview at that viewport width, so you can check your responsive layout without leaving the page.
- An Edit button that opens the full BuilderJS editing window.
The preview area can also be resized by dragging its bottom-right corner.
The Editing Window
Clicking Edit opens the IEM Block Editor in a new browser window. The window is split into two areas: the email canvas on the left and the settings sidebar on the right.
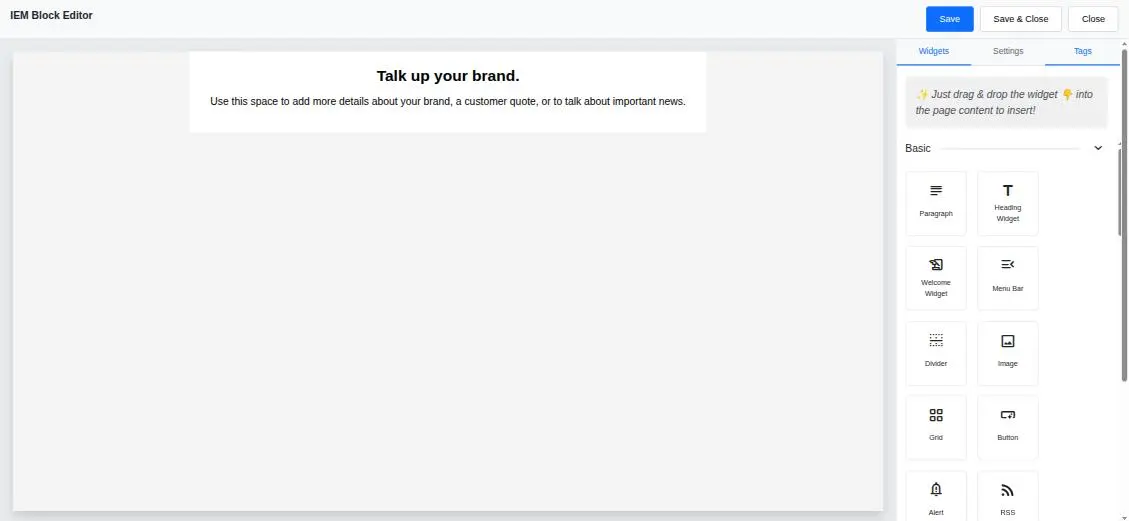
The IEM Block Editor: canvas on the left, widget palette on the right
The Toolbar
Three buttons sit at the top right of the editing window:
| Button | What it does |
|---|---|
| Save | Writes your design back to the campaign form and refreshes the preview, leaving the editor open so you can carry on working. |
| Save & Close | Saves your design and closes the editing window. |
| Close | Closes the editing window. You are asked to confirm, because any changes made since your last save are discarded. |
The Sidebar
The sidebar has three tabs:
- Widgets — the palette of content blocks you drag onto the canvas. See BuilderJS Content Widgets.
- Settings — context-sensitive settings for whatever you have selected on the canvas.
- Tags — merge tags, custom fields, surveys and dynamic content you can insert into your text. See BuilderJS Merge Tags.
Building an Email
To build your email:
- Drag a widget from the Widgets tab onto the canvas to add content such as text, images, buttons, dividers and spacers.
- Select an element on the canvas to reveal its settings in the Settings tab, where you can adjust styling, spacing, alignment and padding.
- Reorder content by dragging blocks into a new position.
- Structure your layout using the Grid widget to create multi-column, responsive designs that adapt to mobile devices.
Styling is applied as inline CSS, which is the most reliable way to keep formatting intact across the wide range of email clients your recipients use.
Selecting and Editing
Clicking an item on the canvas selects it and switches the sidebar to Settings. A breadcrumb at the top of the panel shows where you are in the structure — for example Block ▸ Heading — so you can step back up to the containing block. A small floating toolbar appears over the selection with buttons to insert, duplicate, delete and deselect.
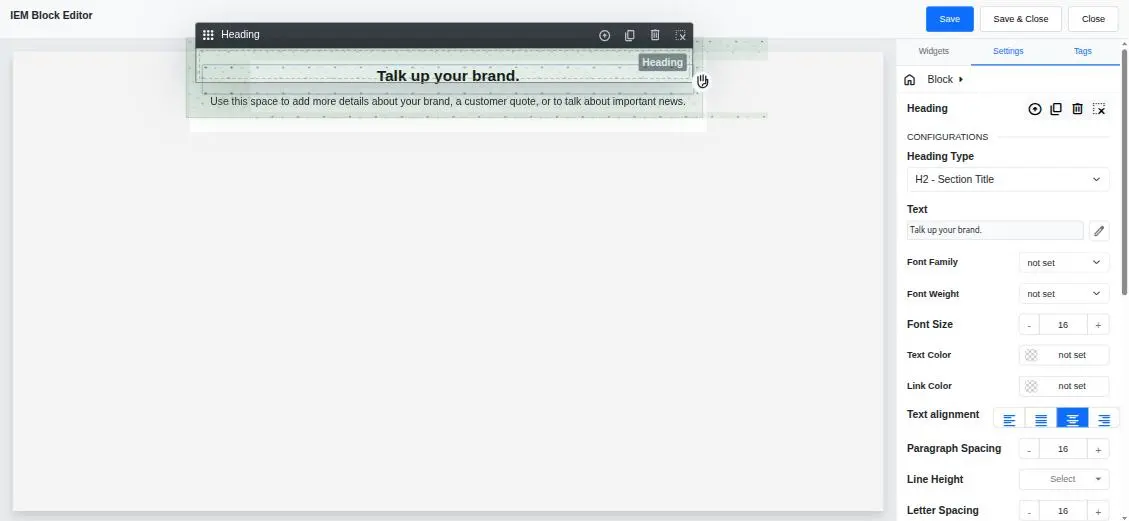
Settings for a selected Heading element
The settings available depend on what you selected. A Heading, for example, offers:
- Heading Type — H1 (Main Title) through H6 (Smallest Title)
- Text, with an inline edit button
- Font Family, Font Weight and Font Size
- Text Color and Link Color
- Text alignment and Text Direction (left-to-right or right-to-left)
- Paragraph Spacing, Line Height and Letter Spacing
Block Padding
Scroll to the bottom of the Settings tab to find Custom Block Padding. Set Top, Left, Right and Bottom independently, all in pixels. Click the ✕ next to a side to clear that value and fall back to the layout default, or use the link button to change all four together.
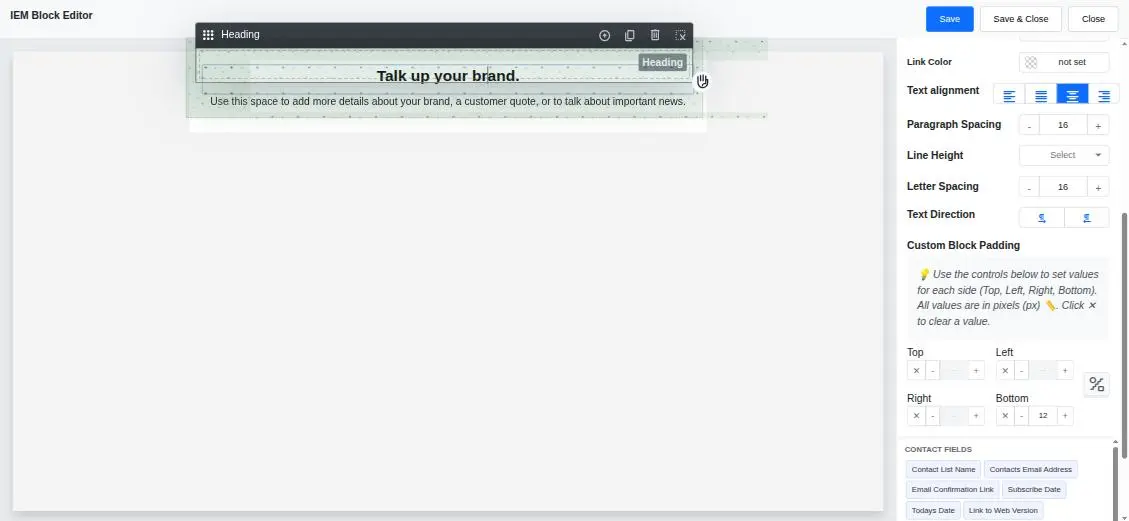
Custom Block Padding controls
Selecting the block itself (rather than an element inside it) gives you Background Settings instead: background colour, a background image with upload and URL options, image size, horizontal and vertical position, and a repeat toggle.
Working With Images
Images you upload from the editor are stored on your own server alongside the campaign or template they belong to. BuilderJS accepts the usual web image formats — PNG, JPG/JPEG/JPE, GIF, BMP, TIFF and WebP.
Previewing Your Email
Email previews render inside an isolated frame, so the editor’s styles no longer conflict with the surrounding admin interface. The preview appears much closer to how your recipients will actually see the email — what you see is what your subscribers get.
Use the Mobile, Tablet and Desktop buttons above the preview to check each breakpoint. The preview refreshes automatically each time you click Save in the block editor.
You can also validate your email to check how it displays in a variety of popular email clients. See Validating an Email for more information.
Preheader Text
BuilderJS supports preheader text — the preview snippet that appears after the subject line in recipients’ inboxes. The Email Pre-header field sits directly beneath the subject line in the content editing step for newsletters, autoresponders and email templates. See Email Preheader Text for guidance and best practices.
Plain-Text Version
As with every editor, your BuilderJS email can include a separate plain-text version for improved deliverability and as a fallback when HTML cannot be rendered. The Text Content section sits below the BuilderJS preview on the content step. See Text Editor for information on the plain-text editor.
How Your Design Is Stored
When you save, BuilderJS generates the final email HTML and embeds a machine-readable copy of your design inside it. That embedded copy is what allows the editor to reopen your email later with every block, setting and style still editable.
This has two practical consequences:
- Editing the HTML outside BuilderJS breaks re-editability. If you replace the content by uploading an HTML file, or hand-edit the generated HTML elsewhere and remove the embedded design data, reopening the item in BuilderJS gives you a blank canvas instead of your design.
- Copy items rather than rebuilding them. To reuse a design, save it as a template or copy the campaign, so the design data travels with it.
Related Pages
- BuilderJS Content Widgets — every widget in the palette and what it does
- BuilderJS Merge Tags — inserting contact fields, custom fields, surveys and dynamic content
- Creating and Editing Emails — comparison of all available editors
- Templates — the bundled template library