

BuilderJS Merge Tags
The Tags tab in the BuilderJS sidebar is where you personalise an email. It lists every merge tag available to you, grouped by source. Click a tag and it is inserted into your content at the cursor position.
For an introduction to the editor itself, see BuilderJS Editor.
Inserting a Tag
- Click into the text where you want the personalised value to appear, so the cursor is positioned inside an editable element.
- Open the Tags tab in the sidebar.
- Click the tag you want.
The tag is inserted at the cursor as literal text, such as %%emailaddress%%. When the campaign is sent, Interspire replaces each tag with the matching value for that recipient.
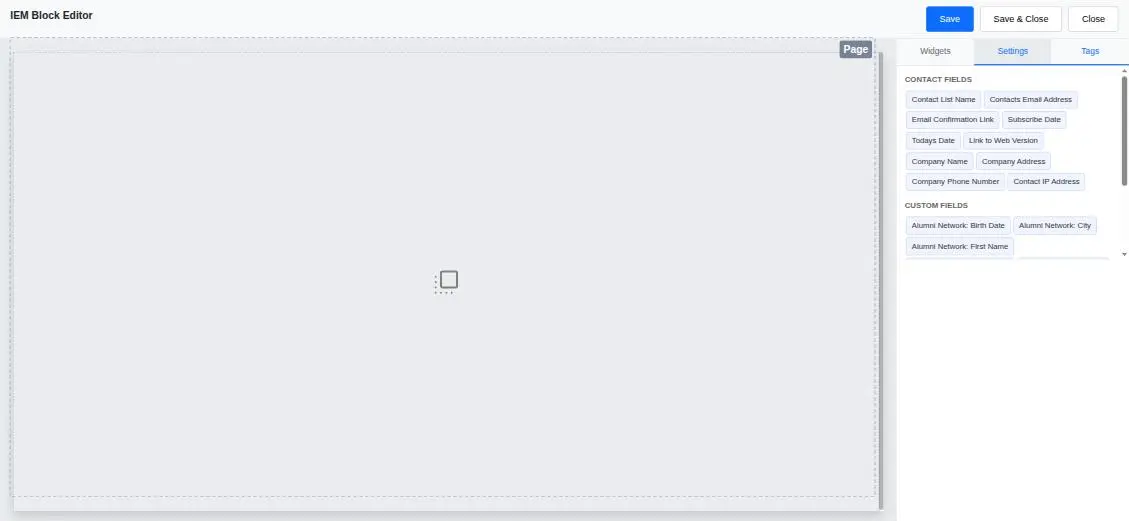
The Tags panel, showing contact fields and custom fields
Contact Fields
These tags are always available, regardless of how your contact lists are configured.
| Tag | Inserts |
|---|---|
%%listname%% | The name of the contact list the recipient belongs to |
%%emailaddress%% | The recipient’s email address |
%%confirmlink%% | A link the recipient clicks to confirm their subscription |
%%subscribedate%% | The date the recipient joined the list |
%%todaysdate%% | The date the email was sent |
%%webversion%% | A link to the online version of the email |
%%companyname%% | Your company name, from the recipient’s contact list |
%%companyaddress%% | Your company address, from the recipient’s contact list |
%%companyphone%% | Your company phone number, from the recipient’s contact list |
%%ipaddress%% | The IP address the recipient subscribed from |
The three company tags are populated from the Company details section of each contact list, not from a single global setting — so a list with those fields left blank produces an empty value. Configure them on every list you send to, and use them in your footer to stay compliant with the CAN-SPAM act. See Contact Lists for where these values are configured.
Custom Fields
The Custom Fields section lists the custom fields defined on your contact lists, each labelled with the list it belongs to — for example Alumni Network: First Name. Only fields on lists you have access to are shown.
Because a custom field belongs to a specific contact list, a tag only resolves for recipients on that list. If you send a campaign to several lists, use fields that exist on all of them, or make sure every field you reference has a sensible default so recipients on other lists do not receive an empty gap in the sentence.
See Custom Fields for how to create and manage them.
Surveys
The Surveys section lists the surveys available in your installation. Inserting a survey tag places a personalised link to that survey, so responses are attributed to the recipient who clicked.
The section is empty when no surveys have been created. See Surveys for more information.
Dynamic Content
The Dynamic Content section lists your dynamic content tags. These swap in different blocks of content depending on rules you define against the recipient’s data — different offers by region, or a different greeting by membership tier, from a single campaign.
The section is empty when no dynamic content tags have been created. See Dynamic Content Tags for how to define them.
Testing Your Personalisation
Merge tags are not resolved in the editor or in the design preview — you see the raw %%...%% text until the email is sent. To check that your personalisation reads correctly, send a test email to yourself from a contact record that has the relevant fields populated. See Sending Email Campaigns for how to send a test.
Related Pages
- BuilderJS Editor — getting started with the drag-and-drop editor
- BuilderJS Content Widgets — the widget palette reference
- Custom Fields — defining fields on your contact lists