This step-by-step guide will walk you through installing Interspire Email Marketer (IEM) on Ubuntu using a VULTR One-Click App Virtual Private Server (VPS). Interspire needs a LAMP (Linux, Apache, MySQL, and PHP) or LEMP (Linux, Nginx, MySQL and PHP) stack to run. Please review Interspire’s Server Requirements for more details. We will be using VULTR’s One-click LAMP app to install Interspire in this tutorial.
Create and Launch the VPS
Creating a VPS on VULTR is quick and only takes a few clicks:
- Choose the Server Type and select
Compute - Depending on your expected usage select either
DedicatedorSharedCPU - Choose a Server Location.
- Pick a Server Size. For the purposes of this tutorial we will select a VPS with 1 CPU and 1 GB of RAM. This is more than enough to manage several thousands contacts and send them emails every dayRename the subdirectory on your server.
- Choose the server Image by clicking on
Configure Software
Switch to the tab over fromOperating SystemtoMarketplace Apps. Once you do, a list of One-Click Apps to deploy will be displayed. SelectLAMP. - Set a Server Hostname & Label. We will use
iem-installation - Add or Select the SSH keys you want to deploy on this instance to allow remote SSH access.
- Click on Deploy Now
After clicking on Deploy, VULTR will deploy the server. It will be provisioned very quickly. Once it is, view its details. Take note of the server’s IP address to setup DNS in the next step.
Create DNS Records for the new Server
To complete the Interspire installation, you will need to have access to the server you have just created. The license key generated for Interspire and the name of the server must match.
The variations on how to setup DNS records vary greatly from provider to provider. Follow the instructions from your DNS provider to add an A record with the IP address you noted in the previous step.
Pre-requisites
Connect to the new server via SSH and complete pre-requisites steps before starting the actual Interspire installation.
$ ssh [email protected]1. Create a non-root user with sudo access
- Add the new user
# adduser new_user - Add the new user to the sudo group
# adduser new_user sudo - Test the new user
- Become the new user
# su - new_user - Confirm you are the new user
$ whoami - Verify that the new user has sudo access
$ sudo whoami
- Become the new user
2. Refresh the Server Packages
$ sudo apt update && sudo apt upgrade -y
$ sudo reboot
3. Install a free Let’s Encrypt SSL Certificate
All web servers should now run over HTTPS. Let’s get and install a free SSL certificate from Let’s Encrypt.
Open a new SSH session to the new server.
$ ssh [email protected]- Remove any default certbot package that may have been installed
$ sudo apt-get remove certbot - Make sure that snapd is up to date
$ sudo snap install core; sudo snap refresh core - Install Certbot
$ sudo snap install --classic certbot - Make sure certbot can be accessed from your path
sudo ln -s /snap/bin/certbot /usr/bin/certbot - Now get and install the certificate
$ certbot --apache --redirect --agree-tos -d iem-installation.example.com
The --apache flag installs the new certificate on the Apache instance.
The --redirect flag will configure the web server to redirect all HTTP traffic to HTTPS.
The --agree-tos flag automatically agrees to the Terms Of Service.
Let’s Encrypt certificates are valid for 3 months and need to be renewed regularly. Certbot can automate the renewal. Please consult the Certbot documentation to confirm automatic renewal is working correctly on your server.
Install Missing PHP Modules.
VULTR’s default One-click app LAMP installation does not install the PHP IMAP module that IEM needs for bounce processing. Verify the installed PHP version:
$ php -v Install the IMAP module corresponding to the PHP version reported. In this case it was PHP 8.2.
$ sudo apt-get install php8.2-imapCreate DataBase and Database User
On the database front, you need to create a database, create a user, and give privileges to that database to the newly created user.
- Connect to the MySQL Instance
$ sudo mysql -u root -p - Create the database Interspire will use
mysql> CREATE DATABASE iem_db; - Create the Database User
mysql> CREATE USER 'iem_db_user'@'localhost' IDENTIFIED BY 'SUPERSTRONGPASSWORD'; - Grant Access To The Database To The User
mysql> GRANT ALL PRIVILEGES ON iem_db.* to 'iem_db_user'@'localhost'; - Reload The Privilges
mysql> FLUSH PRIVILEGES;
Check All Is Ready
Download check_iem.zip, unzip it, run it, and confirm that the server is ready for the installation of IEM.
$ cd /var/www/html
$ sudo wget https://www.interspire.com/downloads/check_iem.zip
$ sudo unzip check_iem.zip
Go to your browser and verify all is green https://iem-installation.example.com/check_iem.php
All the checks should say OK similarly to the sample screenshot below:
There should be no item that does not say OK. You need to fix any item that does not.
Remove the check files.
$ sudo rm /var/www/html/check_iem.*The preparatory work is now complete. Let’s move to the actual IEM installation.
Copy Installation File And Unzip
- Upload the installation ZIP file to the VPS. Say the /tmp directory
- Unzip the file in the web server document root. Do Replace the file name with the name of the file you have uploaded.
$ cd /var/www/html
$ sudo unzip /tmp/iem-8.5.0.zip - Update the ownership
$ sudo chown -R www-data:www-data /var/www/html/iem-8.5.0 - Update the permissions
This is not strictly necessary and is just a precaution$ chmod -R 755 /var/www/html/iem-8.5.0
Run The One Step Interspire Setup Wizard
- Go to your browser and start the Interspire installation
https://iem-installation.example.com/iem-8.5.0/
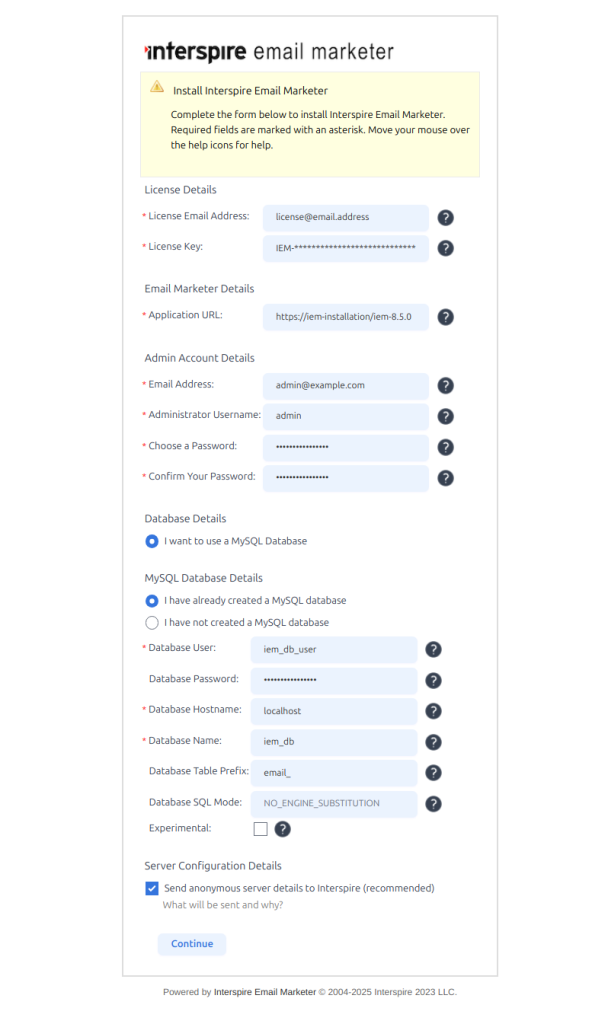
Click on Continue
- Installation Completes
Once the installation completes the completion splash screen will be displayed.
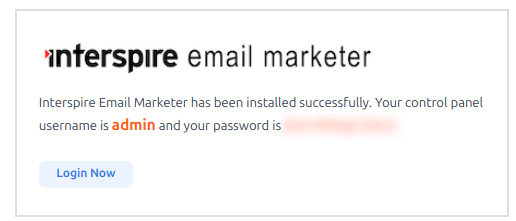
Log into Interspire Email Marketer
The installation is complete. Click on the ‘Login Now’ button to log into your freshly installed Interspire Email Marketer instance.
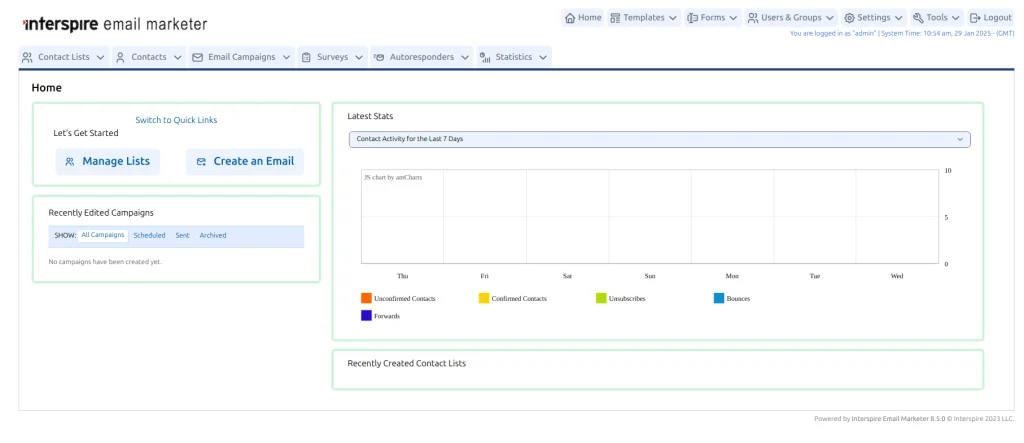
Post Installation Configuration Steps
Now that you have Interspire installed, you need to setup cron for the automated processes, setup your bounce processing, and consult our guide to send your first campaign to get you communicating with your audience in no time.
There are some considerations you should think about before you send your first big campaign. You should (actually must) set up the appropriate DNS records for SPF, DKIM, DMARC (see our guide on improving deliverability). We recommend using a 3rd SMTP Relay Provider such as Inboxroad or SparkPost depending on the volumes you will be sending. Another crucial aspect is warming your way up to your audience.
References: