
cPanel is a popular Graphical User Interface (GUI) provided by many hosting companies to help their customers manage their servers and websites. This guide walks you through installing Interspire Email Marketer (IEM) using cPanel. The focus is on installing Interspire and does not cover the creation of email boxes for example.
Please review the Interspire Server Requirements for more details on what is needed to run Interspire Email Marketer.
Create Domain
Create the new domain that will be used to access Interspire. The domain you create here must match the domain of Interspire’s license key.
- Use the URL and credentials provided by your hosting provider to log into cPanel.
- From the cPanel Tools page, navigate to the
Domainssection and selectDomain. - A new page listing all the domains configured for your account opens. If this is your first domain the list will be empty.
- Click on
Create A New Domainon the upper right corner at the beginning of the list. - Enter the domain name for the instance e.g.
iem-installation.example.com - Click on
Submit
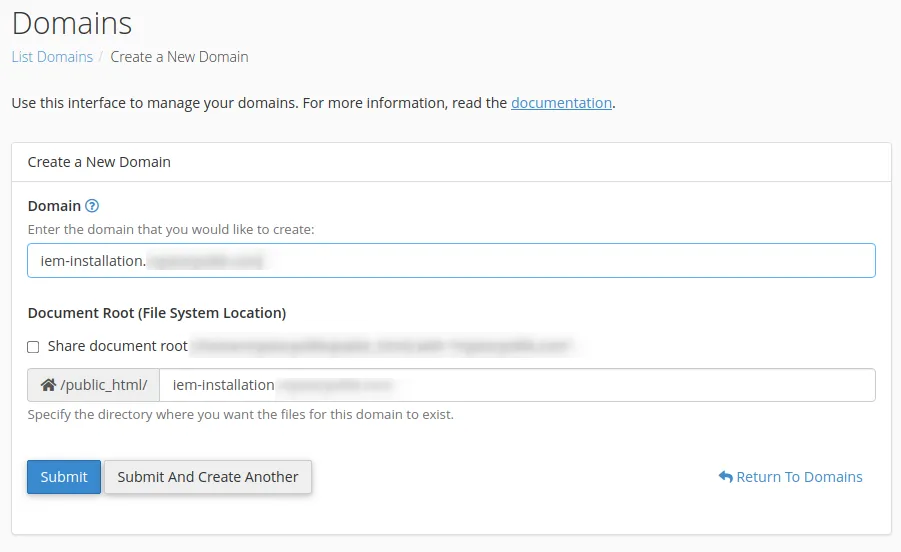
The new domain will be created. Go back to the cPanel Tools page.
Install an SSL Certificate
In this age of hacking, SSL certificates have become an essential tool for protecting web servers. Let’s get and install an SSL certificate using cPanel’s Auto-SSL mechanism.
- From the Tools page scroll to the
Securitysection of the panel. - Click on
SSL/TLS Status - A new page will open listing all the domains configured and their SSL certificate status.
- From there include / exclude the domains you need to generate a certificate for. In this case make sure that
iem-installation.example.comis included. - Click on
Run AutoSSLto generate a certificate. This process may take several minutes to complete.

Once the certificate is generated go back to the Domain section and the domain list page to force HTTPS Redirect for the iem-installation.example.com domain.
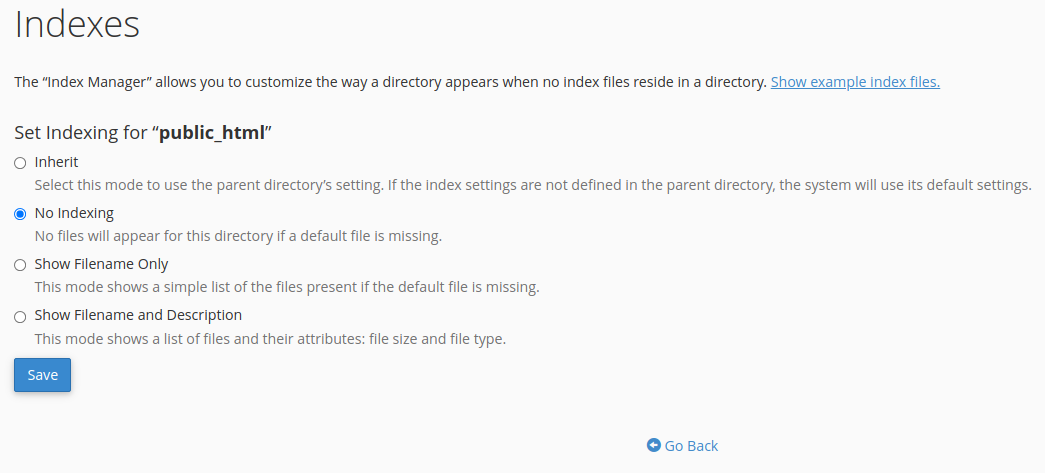
Disable Directory Index Listing
By default cPanel allows the contents of directories to be listed. Let us disable this.
- From the Tools page scroll to the
Advancedsection of the panel. - Click on
Indexes - A new page will open listing all the top-level directories for the account. Click on
Editfor thepublic_htmldirectory - Select
No Indexingand click on Save.

- Verify that directory listing has been disabled by opening your browser to
https://iem-installation.example.com/ - You will get a
403 Forbiddenerror. This is what you want.
Create Database And Database User
For the database, you need to create a database, create a user, and give that user the ability to access that database.
Create Database
- From cPanel’s Tools page go to the Database section and click on
MySQL Datbases. - A new page will open. In the Create New Database section enter the name for the database that IEM will use. We will use the name iem_db
- Click on
Create Database - Once the database is created, click on the
Go Backlink at the bottom of the page.
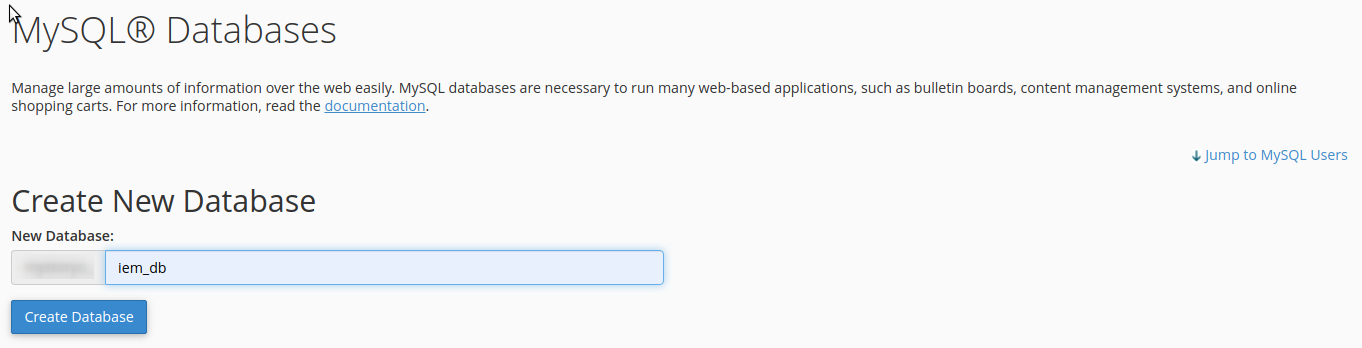
Note that default cPanel installations will prefix the database name and database username with the cPanel username. The full name of the database created above would be
example_iem_dbfor example.
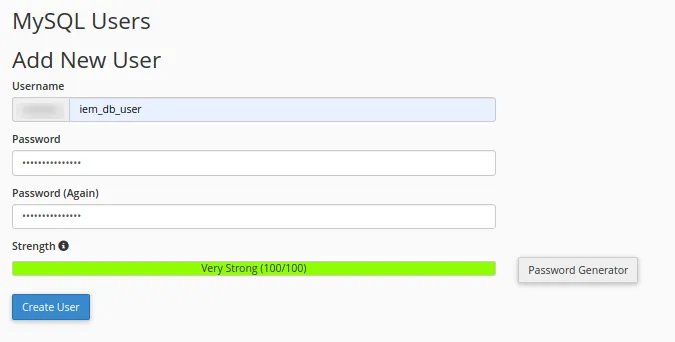
Create User
- From the previous step you are brought back to the MySQL Databases page. Scroll down to the
MySQL Userssection and add a new user. - Enter
iem_db_userin the Username field - Enter a strong password twice
- Click on
Create User - Once the user is created, click on the
Go Backlink at the bottom status page.
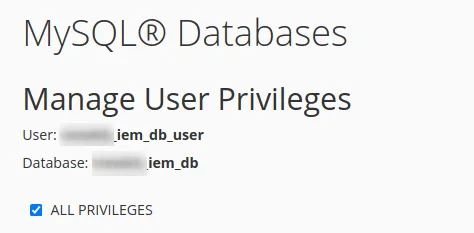
Grant Access To The Database
- From the previous step you are brought back to the MySQL Databases page. Scroll down to the
Add User To Databasesection. - Select the new user
example_iem_db_userand new database'example_iem_db - Click
Add - A new page will open. Grant all privileges by clicking on the
All Privilegescheckbox. - Click
Make Changesto apply the changes.
Check All Is Ready
Interspire provides a useful script to quickly check if all the pre-requisites are met before starting the installation.
- Download check_iem.zip from the interspire website at https://www.interspire.com/downloads/check_iem.zip
- Open the cPanel File Manager and upload the check script to the document root of the website
public_html/iem-installation.example.comfolder - Right click on the file and extract it in place
- Go to your browser open
https://iem-installation.example.com/check_iem.phpand verify all is green
All the checks should say OK similarly to the sample screenshot below:
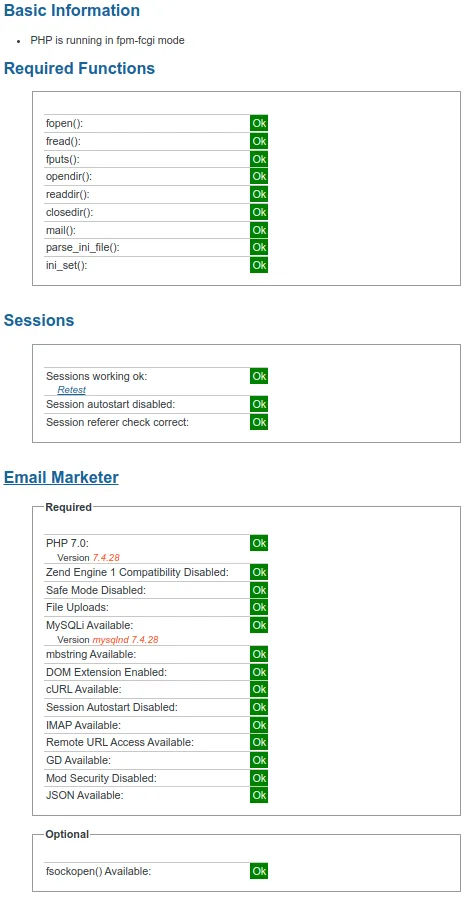
There should not be any entries that does not say OK. You need to fix any item that do not say OK.
Once all the checks complete successfully, remove the check files. From cPanel’s File Manager, right-click on each one in turn and select delete.
The preparatory work is now complete. Let’s move to the actual installation.
Copy Installation File And Unzip.
- Upload the installation ZIP file using the cPanel File Manager in the web root
public_html/iem-installation.example.com - Unzip the file in the web server document root by right-clicking on the file and selecting
Extract
Run The One Step Interspire Setup Wizard
- Go to your browser and start the Interspire installation
https://iem-installation.example.com/iem_650/
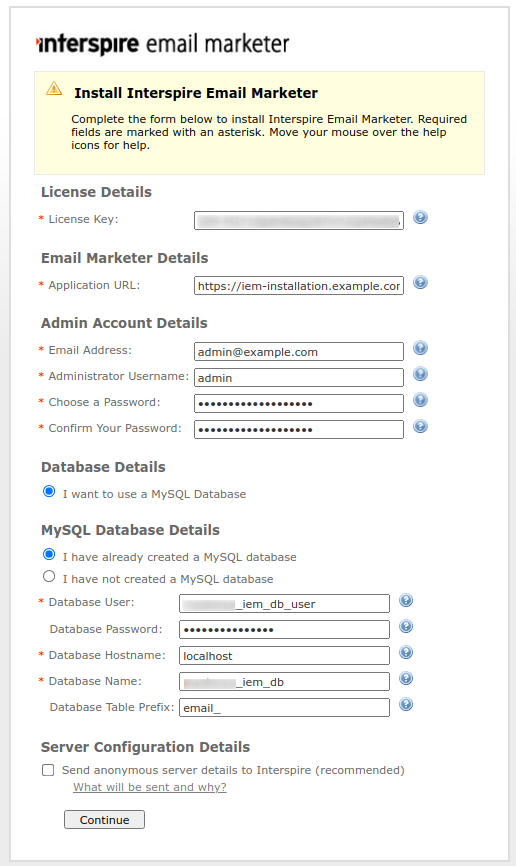
Click on Continue. The installation will proceed.
- Installation Completes
Once the installation is completed, a splash screen will be displayed.
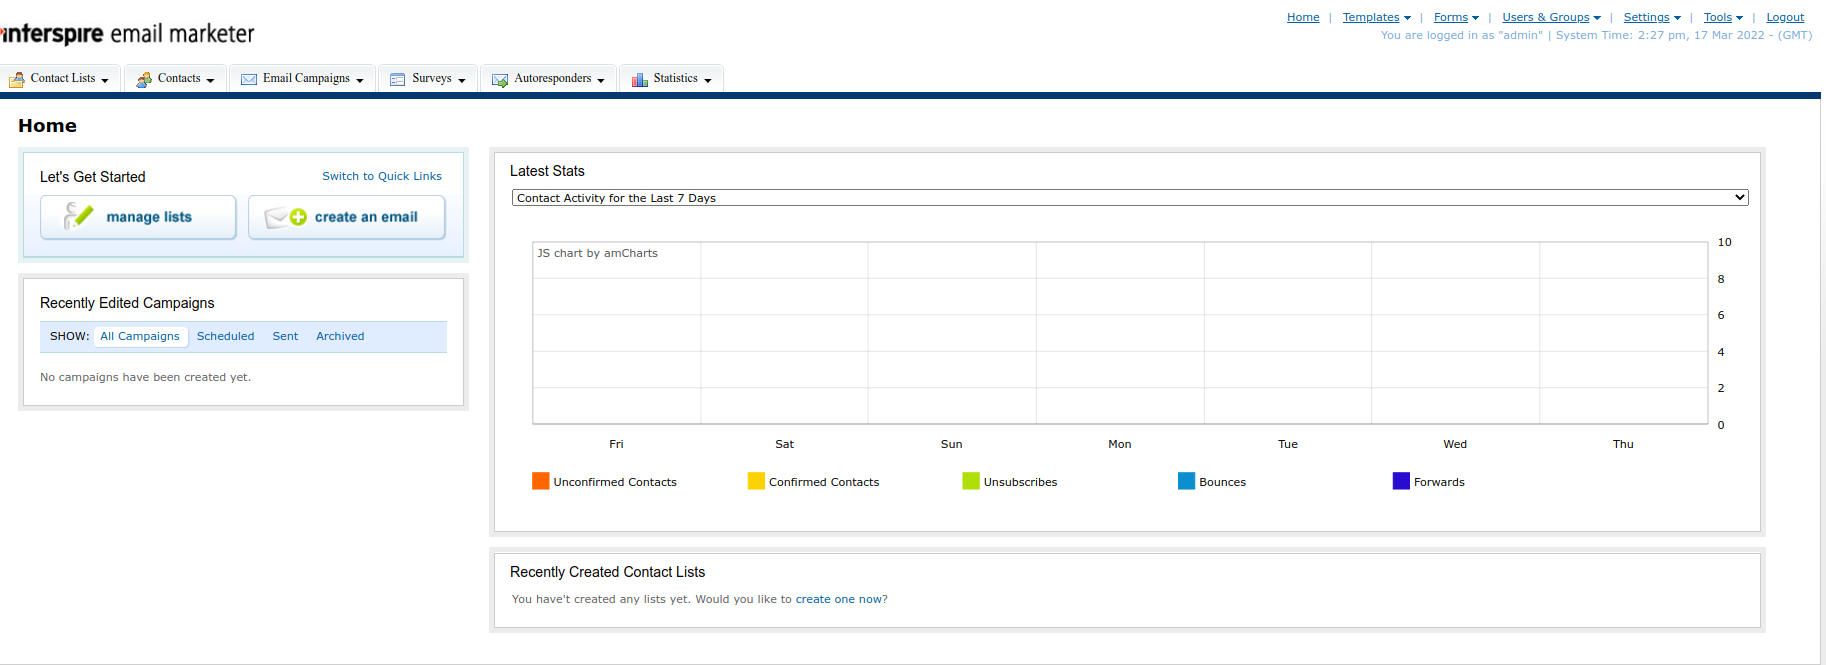
Log into Interspire Email Marketer
Your installation of Interspire Email Marketer is completed. Click on the ‘Login Now’ button to log into your newly installed IEM instance.
Next Steps
Our guide on sending your first email campaign will get you sending in no time. Additionally, setting up cron and bounce processing is crucial.
Before you send your first campaign though, you should set up the appropriate DNS records for SPF, DKIM, and DMARC to improve deliverability. We recommend using a 3rd party Email Delivery Provider such as Inboxroad or SocketLabs depending on the volumes you will be sending. Whether or not you choose to use a such a service be sure to warm-up your setup.
Additional Information: