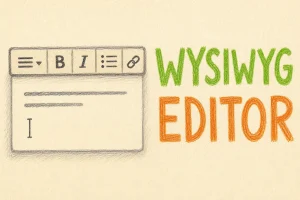
Use the WYSIWYG editor to create and refine email content for campaigns, templates, and autoresponders. It lets you work visually, much like a word processor, while producing the HTML email recipients receive. You can start by creating content in the editor or by uploading an HTML file from your computer. This guide covers the everyday tasks for preparing, checking, and testing an email; use source code only for small, deliberate HTML changes.
For reusable layouts and template management, see Email Templates. For copy, images, links, personalization, and message requirements, see Email Content. For audience selection, delivery, and final checks, see Sending Email Campaigns.
Choose how to create your email
When you reach the content step, choose the option that matches how your email was prepared:
- Create content using the WYSIWYG editor below opens the visual editor so you can write, paste, format, and arrange content directly.
- Upload a file from my computer imports an HTML file you have saved locally. Use this when you already have an email file to review or finish in the editor.
To upload an HTML email:
- Select Upload a file from my computer.
- Select Browse, then choose the local HTML file.
- Select Upload.
- Review the imported content in the editor before you continue.
Images stored beside the HTML file on your computer are not automatically included. Upload those images separately through Image Manager, then select them in the email so their sources are available to recipients.
Get to know the editor
The editor is organized around three areas that support different parts of the job:
- Design Tools contains the controls used to add, insert, and format content. Use it for actions such as text styling, lists, links, images, tables, personalization fields, dynamic-content tags, unsubscribe links, and other layout changes.
- Editing Window is the main canvas where you write and arrange the email. Click where you want content to appear, then type or use a Design Tools control.
- Tags and Tabs switches among the Editing, Source, and Preview windows and shows the relevant HTML tags.
You do not need to learn every toolbar control before starting. Use the visual editor for routine work, Preview to inspect how the message is likely to appear, and Source code only when a precise HTML adjustment is necessary.
Format and paste content
To format text, select the words in the Editing Window, then choose the formatting control you need in Design Tools. Apply headings or emphasis where they help readers scan the message. Use bullet or numbered lists for related items, and choose alignment deliberately instead of relying on copied spacing. Check the result after each larger change, particularly within a multi-column layout.
Paste plain text whenever possible. It is the safest default: paste the words first, then apply fonts, lists, links, and other formatting in the editor. Content copied from websites, documents, or other email tools can carry hidden formatting and markup. That extra formatting may change fonts, spacing, table structure, or the way the email renders after delivery. Reapplying the needed formatting in the editor gives you a cleaner, more predictable result.
Add links, images, and tables
To add a link:
- Select the text that should be clickable.
- Choose Insert/edit link.
- Enter the full URL.
- Choose link text or a target if the dialog requires it, then select Save.
- Verify the link in a test email.
To add an image:
- Place the cursor where the image should appear.
- Choose Insert/edit image.
- Upload or select the image in Image Manager.
- Add an Alternative Description that explains the image's purpose.
- Change its size only when needed, then select Save.
Use tables only when they are needed to organize the email layout or present data. Place the cursor where the table should appear, open Table, and choose the grid for the required number of rows and columns. After you insert it, click inside the table to use its row, column, cell, and table-property controls. Keep tables simple and preview the email after changing them.
Personalize and include required links
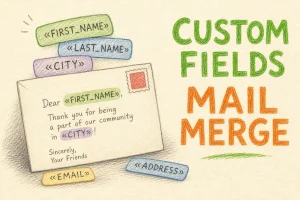
Use a custom field when you need one value for each recipient. Use a dynamic-content tag when rules select an entire content block. Create a dynamic-content tag first under Email Campaigns → Dynamic Content Tags, where you can set its list, content blocks, conditions, and default block, before inserting it from Design Tools. Put the cursor at the exact point where the value or tag should appear, then use the appropriate control in Design Tools to insert the custom field or dynamic-content tag. Verify custom-field substitutions with controlled sends to actual test contacts on the target list, including contacts with both populated and empty custom-field values, so you can confirm the surrounding sentence still reads well.
Where applicable, insert the Unsubscribe Link from Design Tools. Place it where it belongs in the message and verify its behavior with a controlled send to an actual test contact on the target list. This guide explains how to insert the link; confirm your own message requirements and policies separately.
Edit HTML only when needed
For a small HTML correction, select Source code, make the precise change, and select Save. Return to the visual editor or use Preview to confirm the result. Preserve the existing table, row, and cell structure, as well as closing tags. A missing or incorrectly nested tag can cause a layout to shift far beyond the part you intended to edit. If the change is more than a focused correction, make a copy of the content before proceeding and test carefully afterward.
Preview, test, and send
Use Preview before sending for visual and layout checks. Then use controlled sends to actual test contacts on the target list to verify real custom-field substitutions and unsubscribe behavior; include contacts with both populated and empty custom-field values. Review those tests in the email clients that are most relevant to your recipients.
This confirms the editor work. Before delivery, use the complete audience, sender, content, and schedule checklist in Sending Email Campaigns.
Troubleshooting
Images are missing after I upload an HTML file
An uploaded HTML file does not bring along images stored on your computer. Upload each image through Image Manager and select it again in the editor. If the HTML refers to an externally hosted image, confirm that its image URL is publicly reachable.
Tables or columns changed
Check the affected table for missing, mismatched, or incorrectly nested HTML tags, especially after a source-code edit. Formatted content pasted from another program can also add markup that changes the layout. Paste the content as plain text, reapply its formatting in the editor, and preview the email again.
Unexpected markup appears
Content copied from another source can bring markup with it. Replace the affected content by pasting plain text and then format it in the editor. If extra markup continues to appear while editing, check whether a browser extension is altering the page and temporarily disable the suspected extension before reopening the editor.
The email looks different after delivery
Email clients can render the same HTML differently. Use test sends to identify the difference in the clients that matter to your audience, then make a focused adjustment and test again. Avoid making broad layout changes based on a single client without rechecking the rest of the message.