Segments
Viewing Segments
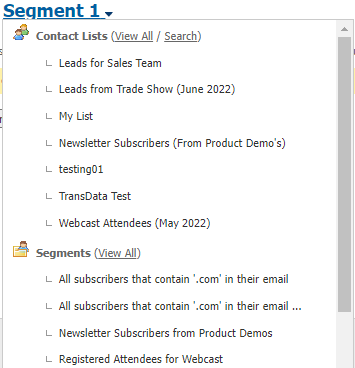
Click Contact lists in the navigation bar, then click View segments.

Viewing Segments
Viewing Segments
| Create a segment | Click this to define a new segment of one or more contact list contacts. See Creating a Segment. |
| Select a box belonging to a segment before choosing an option from the Choose an action list. Select the box at the top of the column to select all segments. | |
| Choose an action | Use this to delete one or more segments. Select the segment (or segments) you want to delete and select Delete the selected segment(s). |
| Segment Name | This displays the descriptive name of the segment. |
| Created | This displays the date on which the segment was defined. |
| Contacts | This displays the current number of contacts within the segment (those in the relevant contact list or lists, whose information matches the segment’s rules). |
| Action | - Click View contacts to see a list of all the contacts in a segment. See Viewing a Contact in a Segment. - Click Edit to modify a segment’s settings. The fields that display are the same as the Create a segment screen; see Creating a Segment. - Click Copy to create a new copy of the segment. The new segment displays, with “Copy of” appended to the original name. - Click Delete to remove the segment from Interspire Email Marketer. Note: When you delete a segment, the contacts in the segment are not deleted. |
Creating a Segment
Take the following steps to create a segment:
- Click Contact lists in the navigation bar, then View Segments.

Creating a Segment
- Click Create a Segment.

Creating a Segment: Configure Segment
- Enter a descriptive Segment name.
- In the Segment contacts from list, select the contact lists you want to include in the segment. You can use the search box below the list to find contact lists.
- Choose a Match type. This controls how Interspire Email Marketer applies the rules you configure.
- Select Match all rules (AND condition) to find only contacts who match every rule you define.
- Select Match any rule (OR condition) to find contacts who match one or more of the rules you define.
- Define your Segment rules. These are the conditions a contact must match to be included in the segment.
Do the following for each rule:
- The first drop‐down list contains the fields available for the contact list (or lists) you selected. Select the basic or custom field you want to base the rule on.
- In the second drop‐down list, select contains to search for contacts that match the information you add in the text field. Select does not contain to search for contacts that do not match the information you add in the text field.
- In the text field, enter the information you want to search for.
Note: Click the add icon (
) to insert another rule to the list, or click a rule’s delete icon (
) to delete the rule from the list.
- When you have finished configuring your rules, click Save. The View segments screen displays, with the new segment in the list.
Alternatively click Cancel to return to the View segments screen without saving your changes.
Viewing a Contact in a Segment
To view a list of the contacts belonging to a segment, click Contact lists in the navigation bar, select View segments, and then click the View contacts link next to a segment.
You can:
- Add a new contact: add a contact to Interspire Email Marketer.
- Delete selected contact(s): remove the selected contacts from Interspire Email Marketer.
- Update contacts to receive text campaigns: change the status of selected contacts, allowing them to receive emails in text format.
- Update contacts to receive HTML campaigns: change the status of selected contacts, allowing them to receive emails in HTML format.
- Update contacts status to confirmed: confirmed contacts are those who have replied to a confirmation request email. Use this to change the selected contact or contacts to confirmed status.
- Update contacts status to unconfirmed: unconfirmed contacts are those who have not yet replied to a confirmation request email. Use this to change the selected contact or contacts to unconfirmed status.
You can also view, edit and delete contacts.

Viewing a Contact in a Segment
Viewing Segment Contacts
